How to install macOS Sonoma
Every year, Apple treats us to a major update to macOS, the operating system that powers Mac computers. On September 26, 2023, marks the arrival of one such update, macOS Sonoma. If you want to install Sonoma and take advantage of its new features and interface tweaks, you've come to the right place. In this article, we'll walk you through the installation process step-by-step. Let's get started!
macOS 14 Sonoma system requirements
Before you jump into our step-by-step guide, please take a moment to verify that your Mac is capable of running macOS 14. You can install macOS Sonoma on the following machines:
- iMac Pro (2017 and later)
- iMac (2019 and later)
- Mac Pro (2019 and later)
- Mac Studio (2022 and later)
- MacBook Air (2018 and later)
- Mac Mini (2018 and later)
- MacBook Pro (2018 and later).
If you're looking to install the new macOS on an older Mac that is not officially supported, there may be workarounds available in the form of patchers developed by third-party developers.
How to get your Mac ready for macOS Sonoma
If you are planning to upgrade to macOS Sonoma, there are a few steps you should take to prepare your Mac and protect your data.
Clean up your Mac
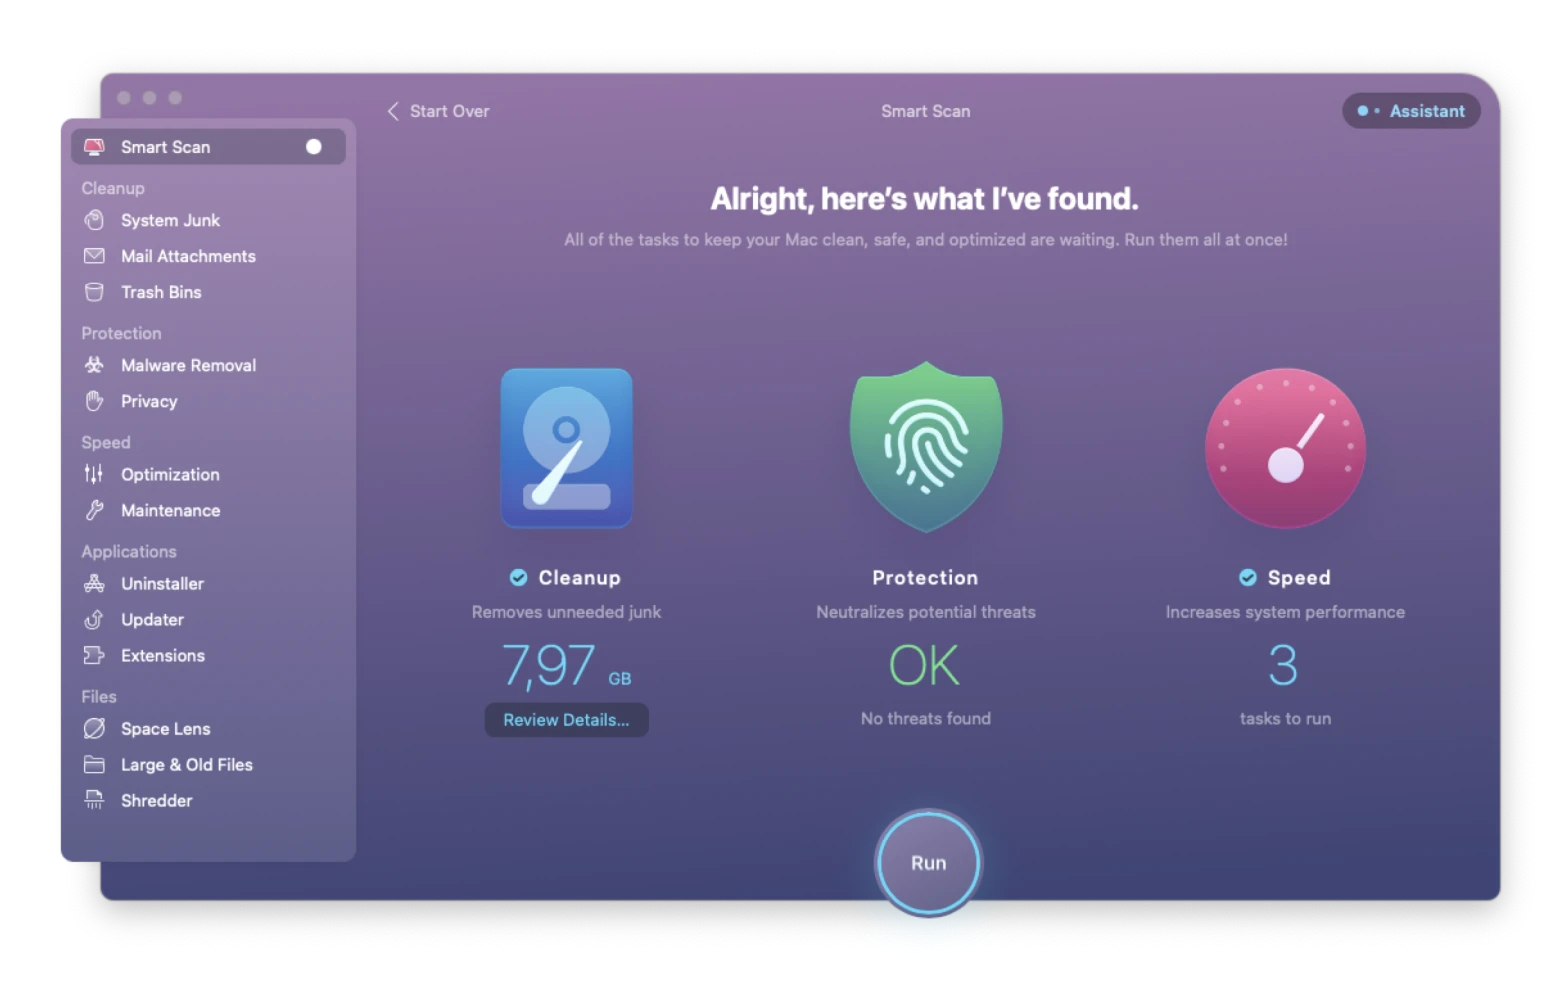
One of the first things to do before installing a new macOS is to clean up some of the junk that has been sitting on your Mac for a while. You can do this manually, but it will likely take forever! Use CleanMyMac X instead. The app's Smart Scan feature performs a system-wide check and helps you reclaim space and optimize performance in just a few clicks. This step will ensure your Mac is running smoothly and at its best before you upgrade.

We bet you'll want to use CleanMyMac X many more times after you install macOS Sonoma. Once you start using your Mac and get everything set up just right, you'll start collecting junk that you can clean up. After just a month of a clean macOS install, you may find from a few to dozens of GB of junk that can be discarded.
CleanMyMac X offers more than just cleaning up junk files. It includes features such as malware removal, privacy protection, optimization tools, an uninstaller for complete app removal, maintenance scripts for system upkeep, and more.
Back up important data
The next step we recommend you take is to make sure you have a reliable backup of your current Mac setup.
A lot of people use Apple's native Time Machine to back up their files, but we don't recommend it. Users report that Time Machine has a tendency to carry over macOS problems into new installations. In addition, it can't make bootable backups, which means you'll have to go through a lengthy recovery process if your hard drive crashes or something goes wrong.
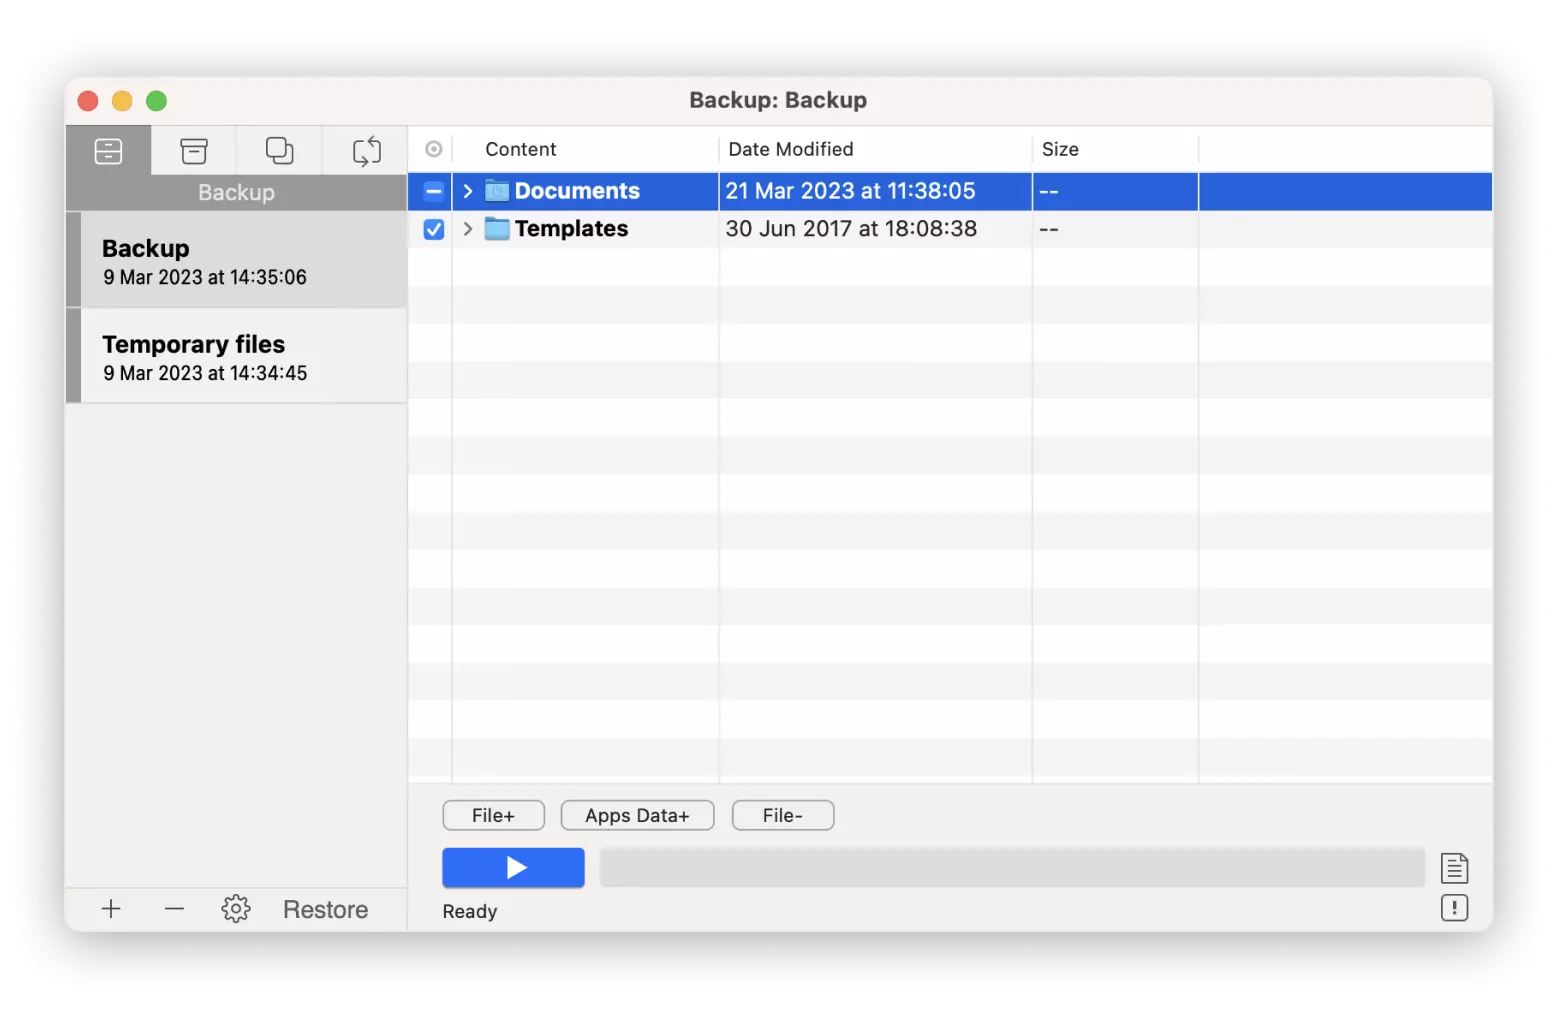
Get Backup Pro is a reliable backup utility that will make sure that you run no risk at all when you install macOS Sonoma or any other version of macOS. Get Backup Pro lets you create both backups and bootable clones, so you can easily move your data to a backup drive if something goes wrong. You also get great features like compression, backup scheduling, and the ability to select specific files for backup.
Here's how to create a backup with Get Backup Pro:
- Connect your external device to your Mac.
- Open Get Backup Pro and click the Backup button.
- Add a new backup project by clicking the plus button.
- Name your project and make sure you choose your external device as the backup destination (click the Settings icon in the lower left).
- Start adding files and app data to the backup.
- Once you've added everything, click the Start button to begin the backup process.
- Your bootable backup will now be stored on the external device.

macOS Sonoma download and guide
If you've followed the precautions above, it's time to install macOS Sonoma on your Mac. Here are the steps that will help you.
- Go to Apple menu > System Settings > General > Software Update.
- Here you'll find the latest information about which software updates you can download.
- If your Mac is compatible and able to download Sonoma, you should see a macOS Sonoma icon in the Software Update menu with a large "Upgrade Now" button next to it. Click on the button to upgrade to macOS Sonoma. Your Mac will then download and install the update. You may need to restart your Mac to complete the process.
You can also clean install macOS Sonoma. This way, you'll be less likely to experience common Sonoma problems, and you'll be able to keep only the data you really need.
Download Sonoma installer and create a bootable USB installer
- Download the installer from the Mac App Store. But be careful, it's important not to rush things here. Your goal is to save the installer to your Applications folder, not to go through the installation process. So if the installer starts automatically, don't click "Continue." Close the window by clicking Quit install. You'll use the installer later when you clean install macOS.
- Take a USB flash drive with at least 16GB of capacity and plug it into your Mac.
- Open Disk Utility, select the USB flash drive, and click Erase on the toolbar.
- Choose APFS as the format and name the volume Sonoma. Next, click Erase.
- Once Disk Utility has erased the USB stick, open Terminal (Go > Utilities > Terminal).
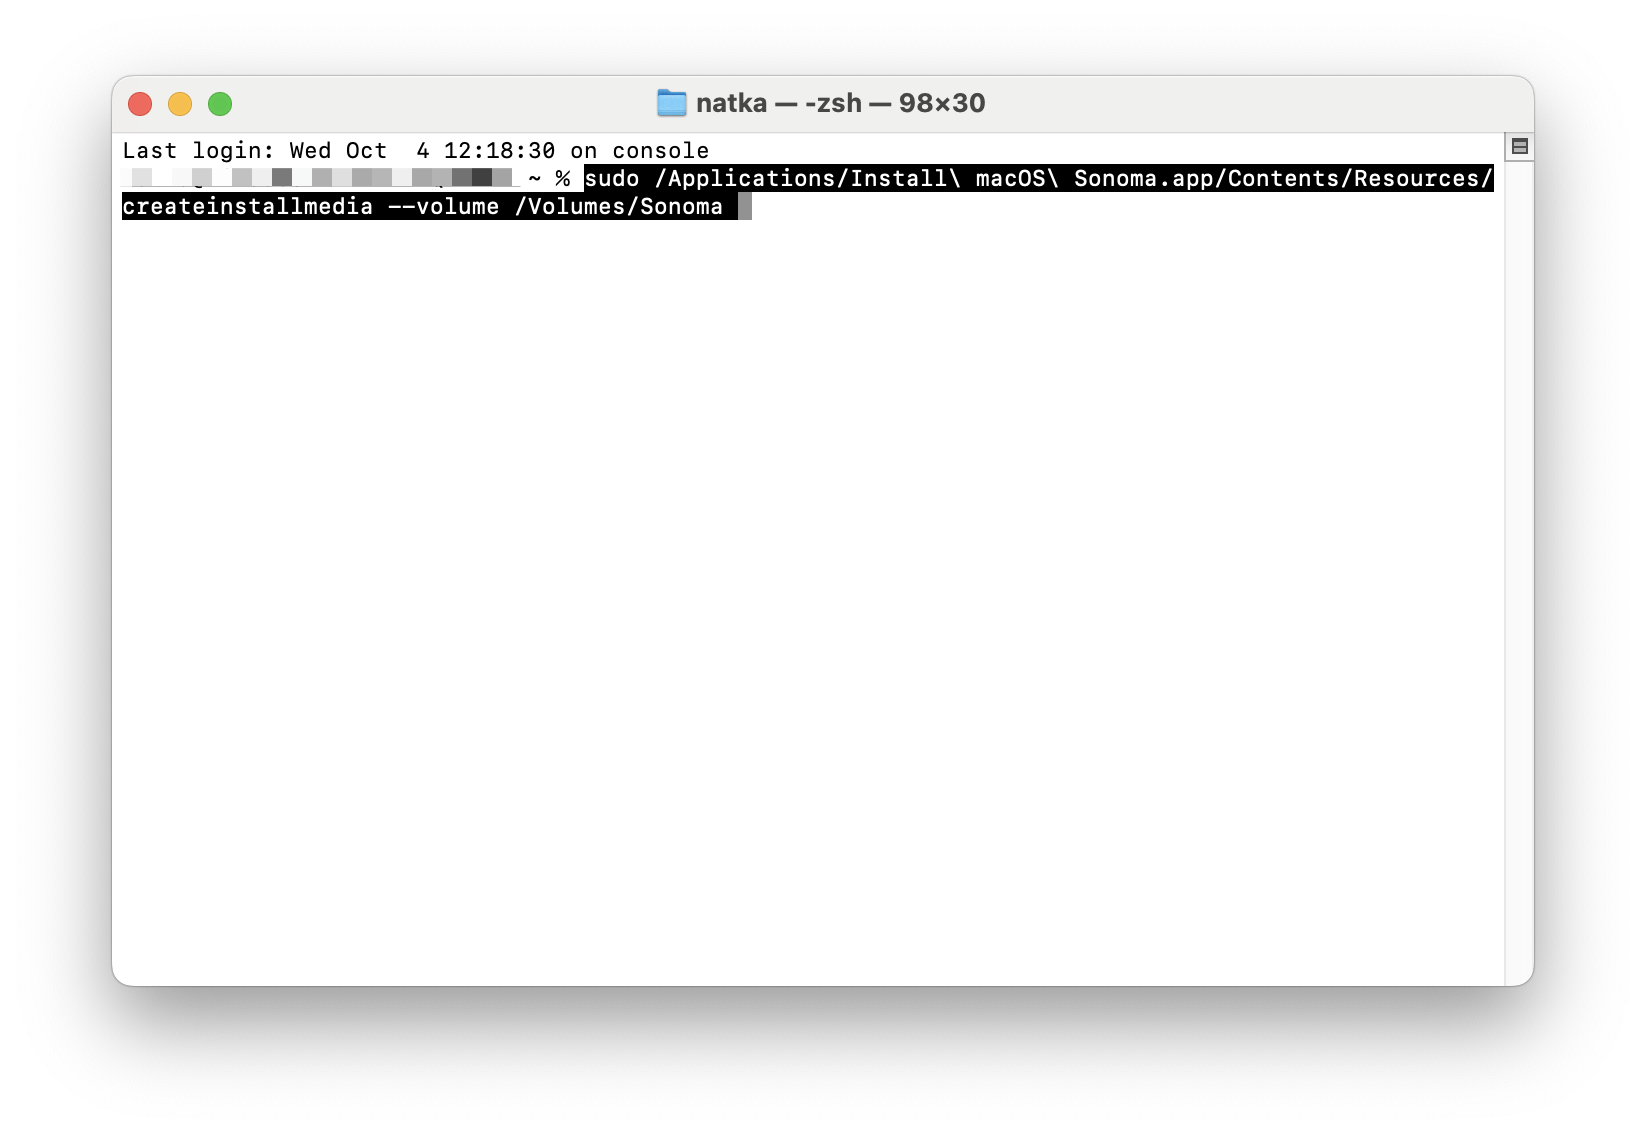
- Type the following command:
sudo /Applications/Install\ macOS\ Sonoma.app/Contents/Resources/createinstallmedia --volume /Volumes/Sonoma - Press Return and, if prompted, enter your admin password. Press Return again and wait for Terminal to build the installer.

Erase your startup drive
Time to say goodbye to your old macOS. Now, you can erase your startup drive. The process for erasing it is different depending on which Mac you have.
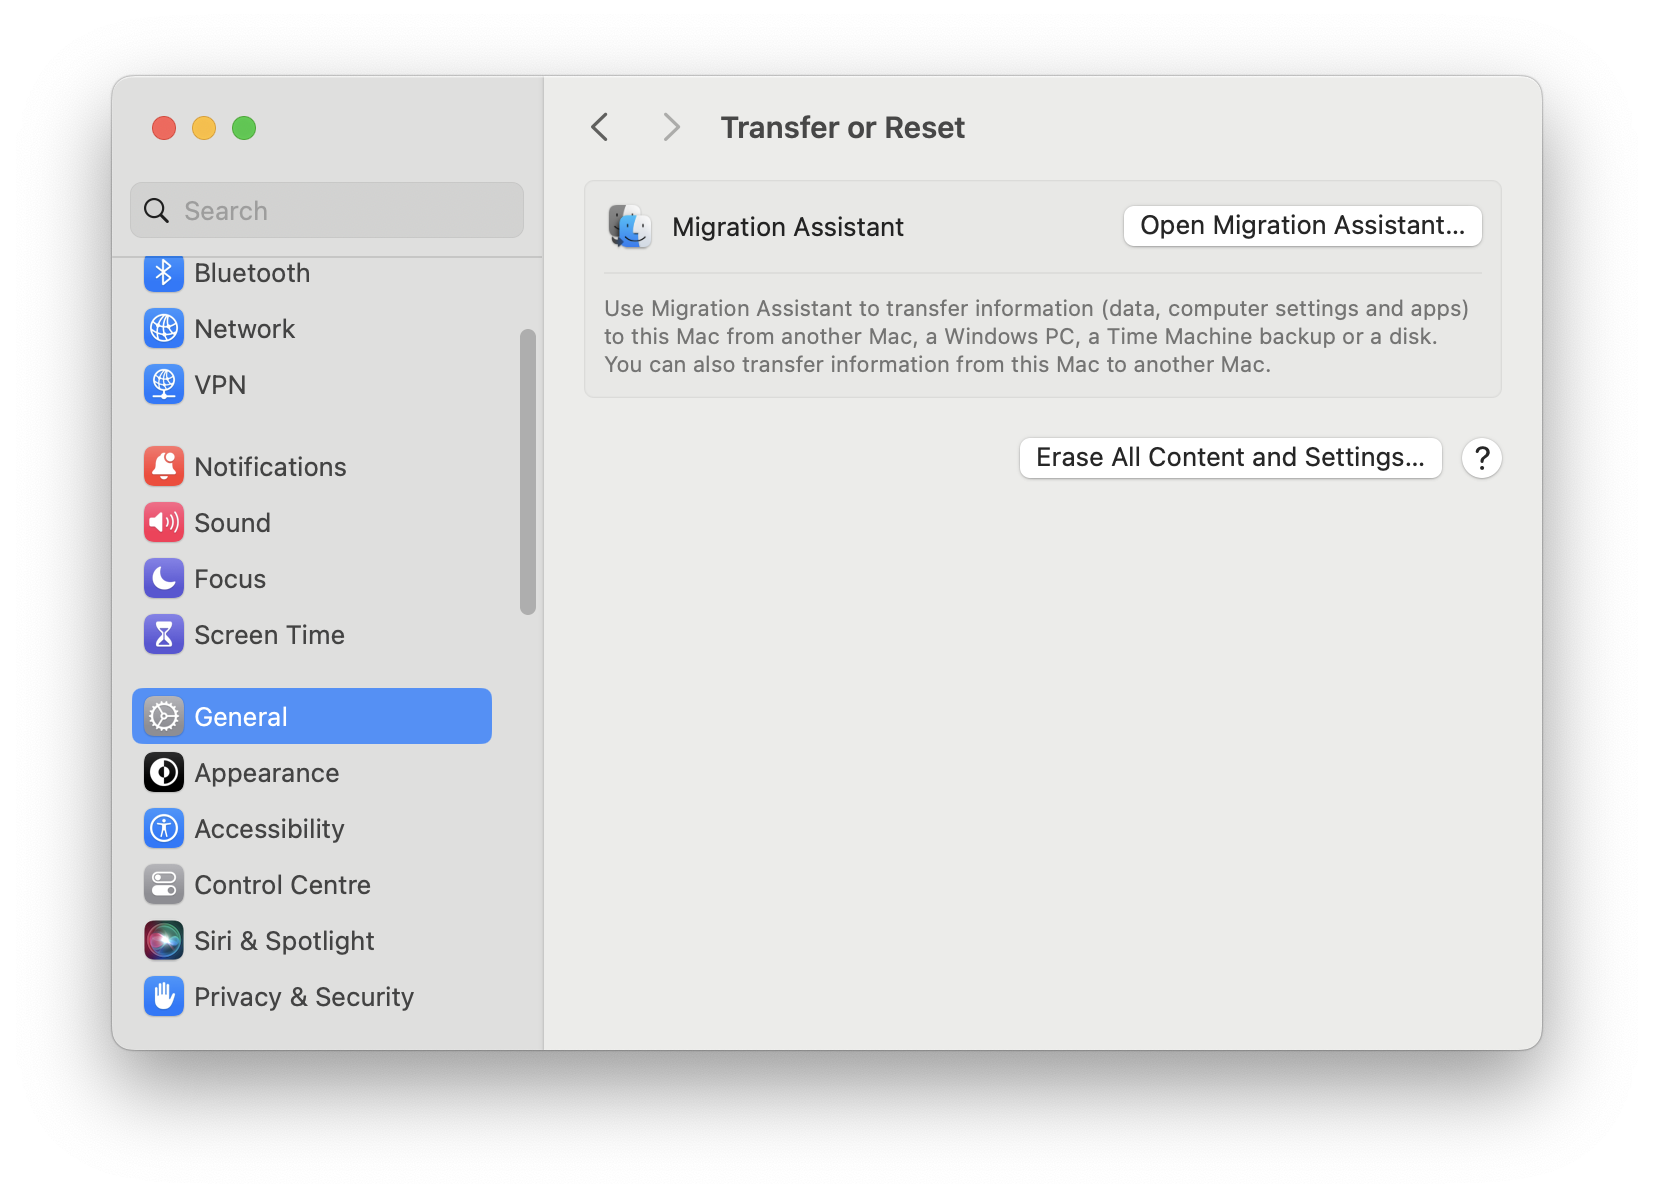
On a Mac with Apple silicon or an Intel-based Mac with a T2 security chip, go to Apple menu, choose System Settings > General > Transfer or Reset, then choose Erase all Content and Settings. Follow the on-screen instructions to erase your Mac.
 On an Intel-based Mac that doesn't have a T2 Security chip, follow these steps:
- Restart your Mac in Recovery mode by holding down Command + R.
- From the macOS Utilities menu, choose Disk Utility.
- Select your boot disk and choose Erase.
- Format it as APFS and give it a name.
- Click Erase.
Install macOS Sonoma
Finally, here’s how to do a clean install of macOS Sonoma using your USB installer drive:
- Restart your computer, and, on a Mac with Apple silicon, press and hold the power button until you see the startup options. On an Intel-based Mac, hold down the Option key, then press the power button.
- When prompted to select a startup disk, select the USB flash drive and follow the on-screen instructions.
- Breathe out. And go celebrate!
macOS Sonoma installation toolkit
So that's how you install macOS Sonoma on your Mac. However, first of all, we recommend you prepare your Mac and protect your data. For this, use CleanMyMac X to get rid of unnecessary files and free up some disk space. Then get Get Backup Pro to create a backup or a bootable clone, so you can easily move your data to a backup drive if something goes wrong.
You can get both apps for free for 7 days through Setapp, an app subscription service for macOS and iOS. If you like it, you can become a paid member for $9.99/month and keep using 240+ great apps for almost any job. In the meantime, we hope you're excited about the upcoming Sonoma experience and all the exciting features it will bring to your Mac.
FAQ:
Is macOS Sonoma stable?
Yes, Sonoma is stable enough for Apple to release it to users. However, be aware that it may still contain some bugs and stability issues.
Which Macs support Sonoma?
You can install macOS Sonoma on the following machines:
- iMac Pro (2017 and later)
- iMac (2019 and later)
- Mac Pro (2019 and later)
- Mac Studio (2022 and later)
- MacBook Air (2018 and later)
- Mac Mini (2018 and later)
- MacBook Pro (2018 and later).
When will the new macOS be released?
Apple released macOS 14 Sonoma in September 2023.
What's new in macOS Sonoma?
macOS Sonoma introduces a host of new features and enhancements, including improved video conferencing, desktop widgets, new screensavers, Game Mode, and more. Check out the best macOS Sonoma features.
Is Ventura better than Sonoma?
Both MacOS Sonoma and Ventura offer unique features and enhancements. However, whether one is better than the other depends on individual preferences and specific needs.
All we can say is that Sonoma comes with such cool features as desktop widgets. Users will be able to place widgets on their desktop from the new widget gallery, which appears to include apps like Weather, Clock, Notes, Photos, and Reminders. macOS Ventura does not support such widgets, forcing you to open each app to see any information.
You can also enjoy a new Game Mode and fascinating screensavers introduced in Sonoma.


