Best Mac photo editors: How to edit photos on Mac effectively [+AI]
Macs are amazing tools for many tasks, including editing your photos, creating visuals for your marketing campaigns, presentations, or other tasks. To edit pictures on Mac, you don’t even need any external software, you can do it with the built-in Photos and Preview apps.
In this article, we’ll discuss how to edit pictures on Mac using these apps and also tackle which other third-party toolkits can be great for your photo editing purposes. If you don’t want to tweak and edit your pictures for hours on end, you can use bulk editors or AI-supported tools that can help remove photo imperfections or adjust the colors very easily. And if you want something to help you illustrate an informational message or a presentation, there are tools geared exactly for that too.
Let’s dive in.
What is the best Mac photo editor?
We value your time and have organized all the solutions in this article to help you find the best tools quickly and easily.
- Luminar Neo for AI-powered photo editing
- PhotoBulk for bulk editing
- TouchRetouch for precise retouching
- CameraBag Pro for professional photo and video editing
- Capto for screen capture and annotation.
How to edit pictures on Mac with the Photos app
If you want to edit photos on Mac using the built-in Photos app, all you have to do is open the app from your dock or in Finder > Applications and drag and drop your image onto the app window.
Once the image is in the editor, you can do basic editing to help make your images shine. Let’s look at some of the most in-demand photo editing features you are also likely to utilize.
Crop, straighten, rotate, and flip
To crop an image in the Photos app on your Mac, first click the Edit button at the top right of your Photos app window to go into editing mode. Next, open the Crop tab at the center top of your Photos window and drag the angles of the cropping frame that appears on your image to make a selection:
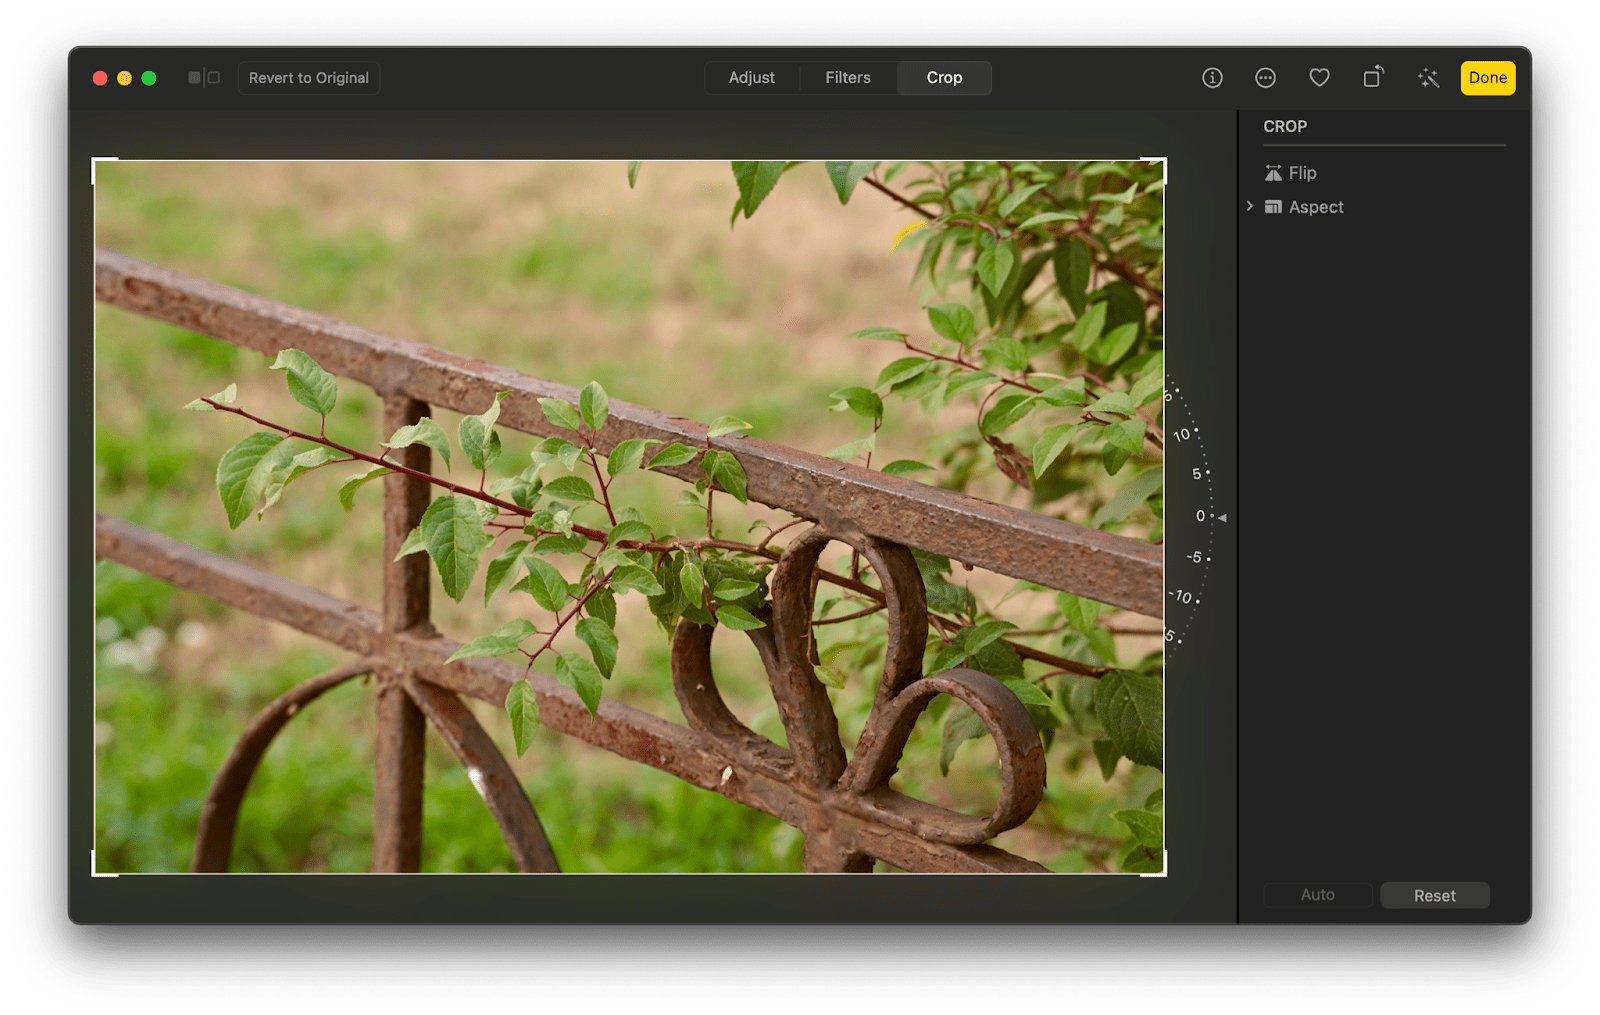
Click Done when you are happy with your result.
You can also use the straightening dial to the right of your image to fix a crooked horizon in your picture. Just adjust the dial until the image looks the way you want to.
To flip your picture, click the Flip icon on the right side of the Photos app window.
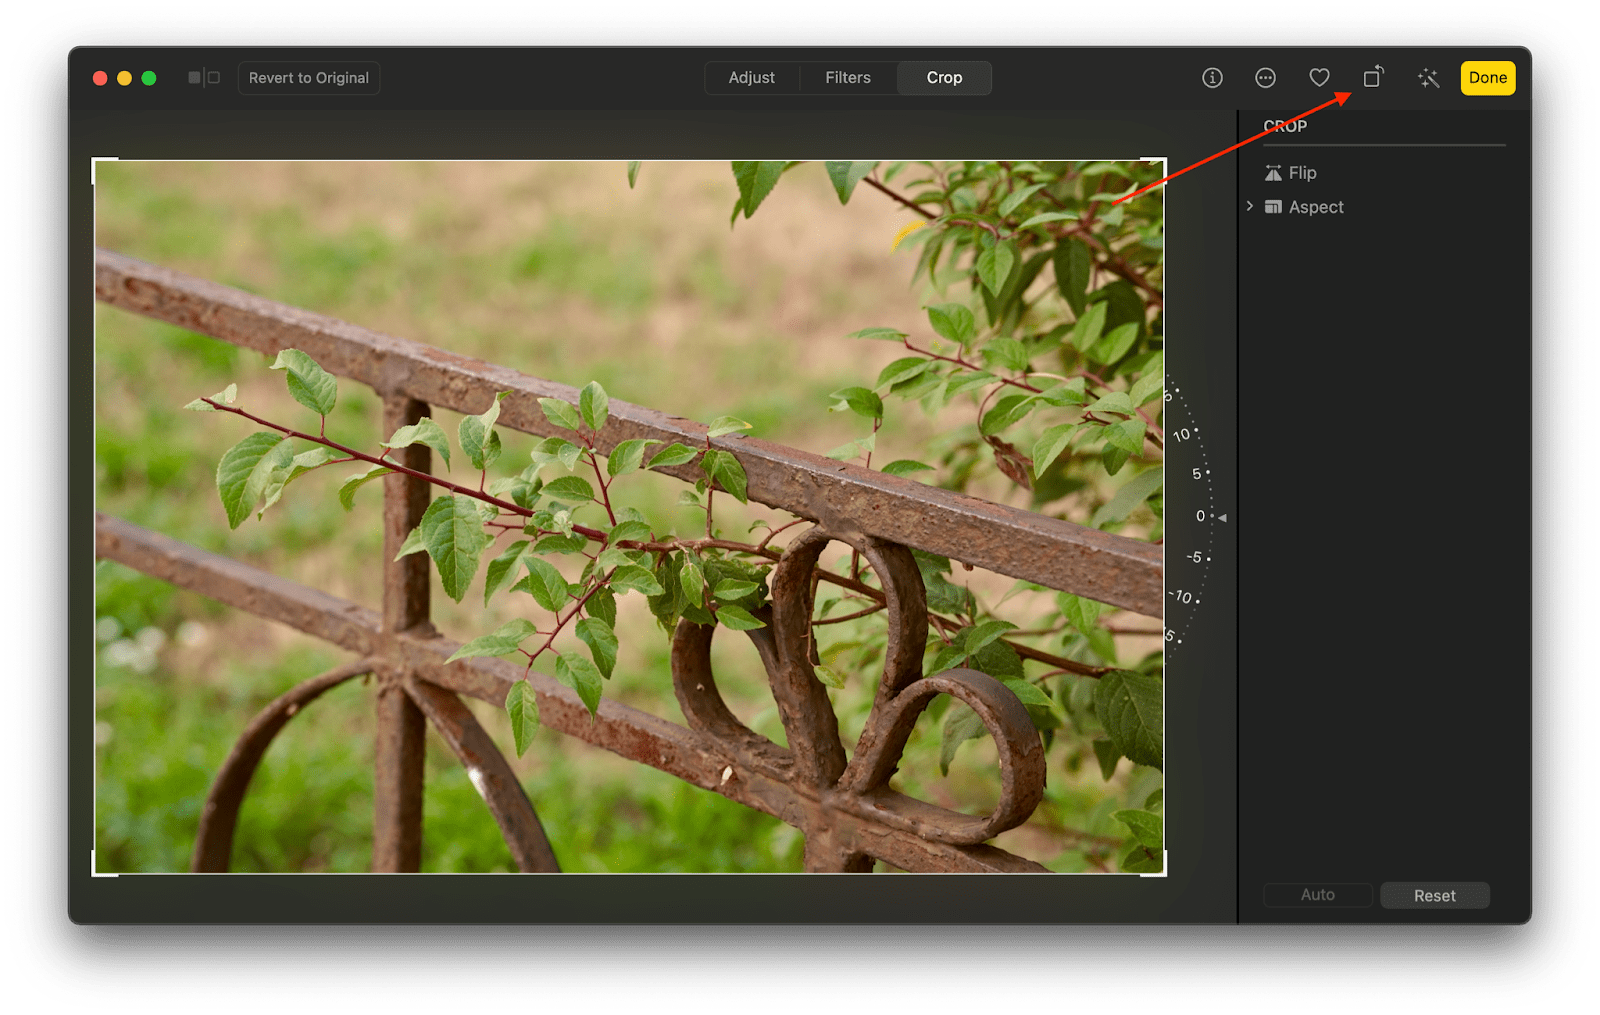
To rotate your image, click the rotate icon at the top right of your Photos app window:
Adjust lighting and exposure
Even if you’ve captured the scene in your shot, there are times when the lighting and/or exposure settings in your camera just didn’t reflect what you saw with your eyes. And sometimes the end result is simply too light or dark and needs correcting.
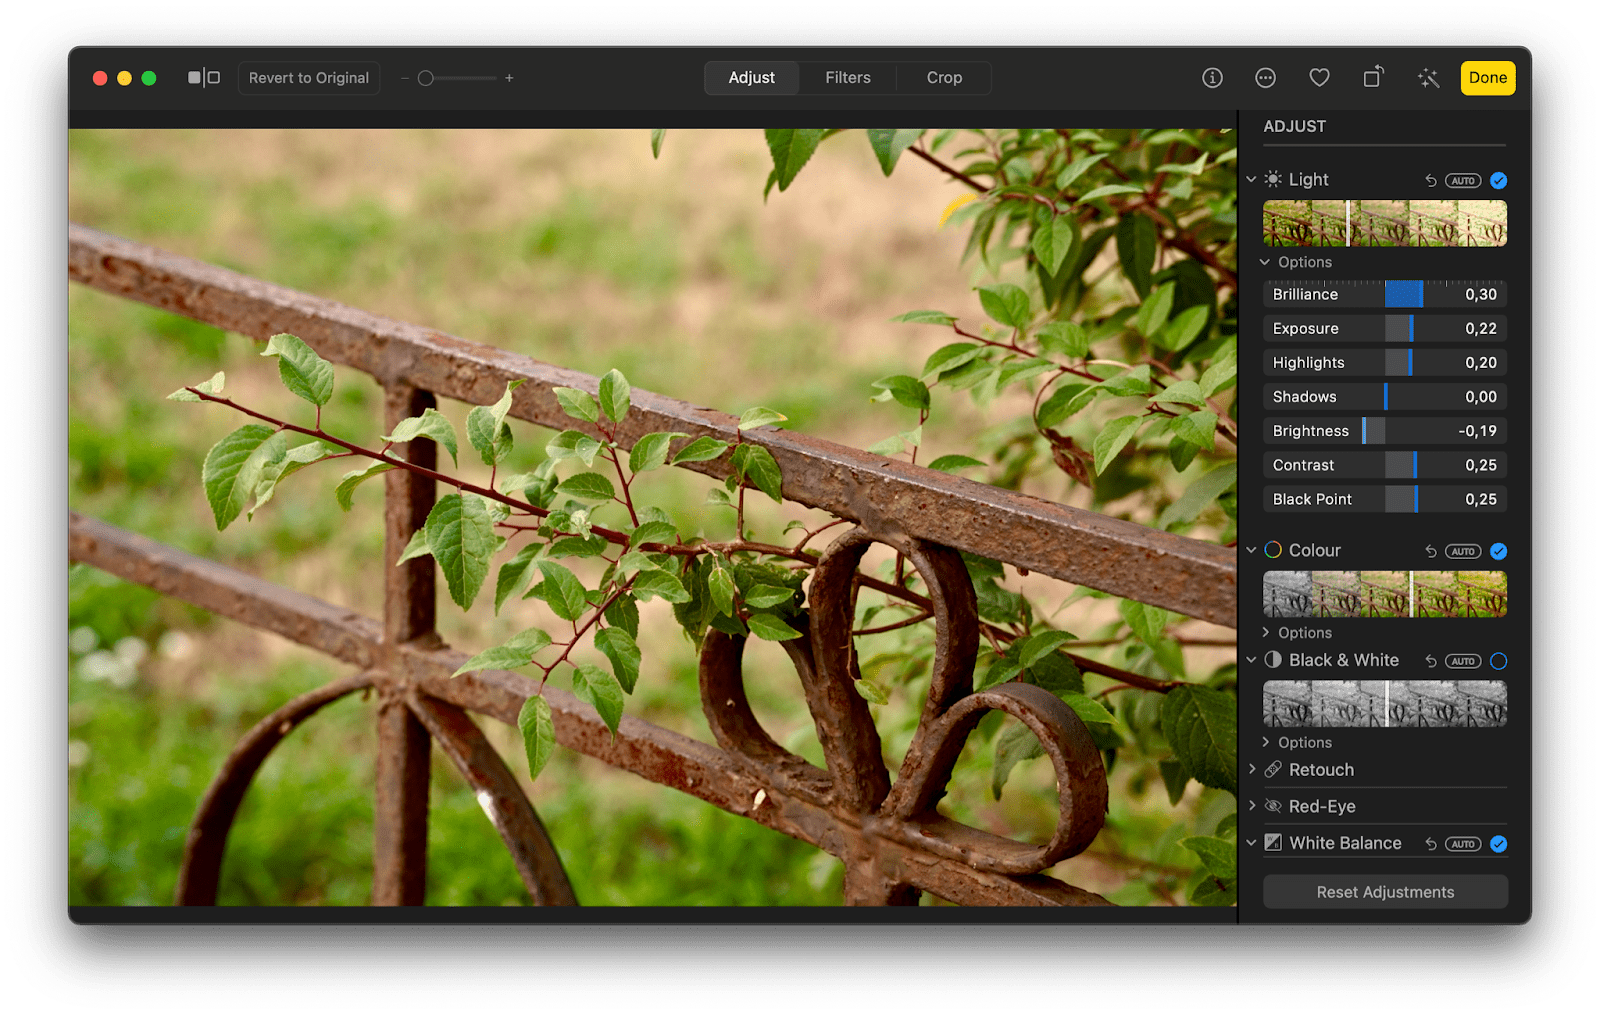
To adjust the light and exposure in your image with the Photos app, go to the Adjust tab when editing your image in the app and drag the thumb along the Light slider to adjust.
You can also open the Options menu under Light to access more tools — Brilliance, Exposure, Highlights, Shadows, Brightness, Contrast, and Black Point. All of these can really help bring out the best light and shadow balance in your image, so we recommend moving the thumbs for each of the offered sliders to find the best combination for your image:
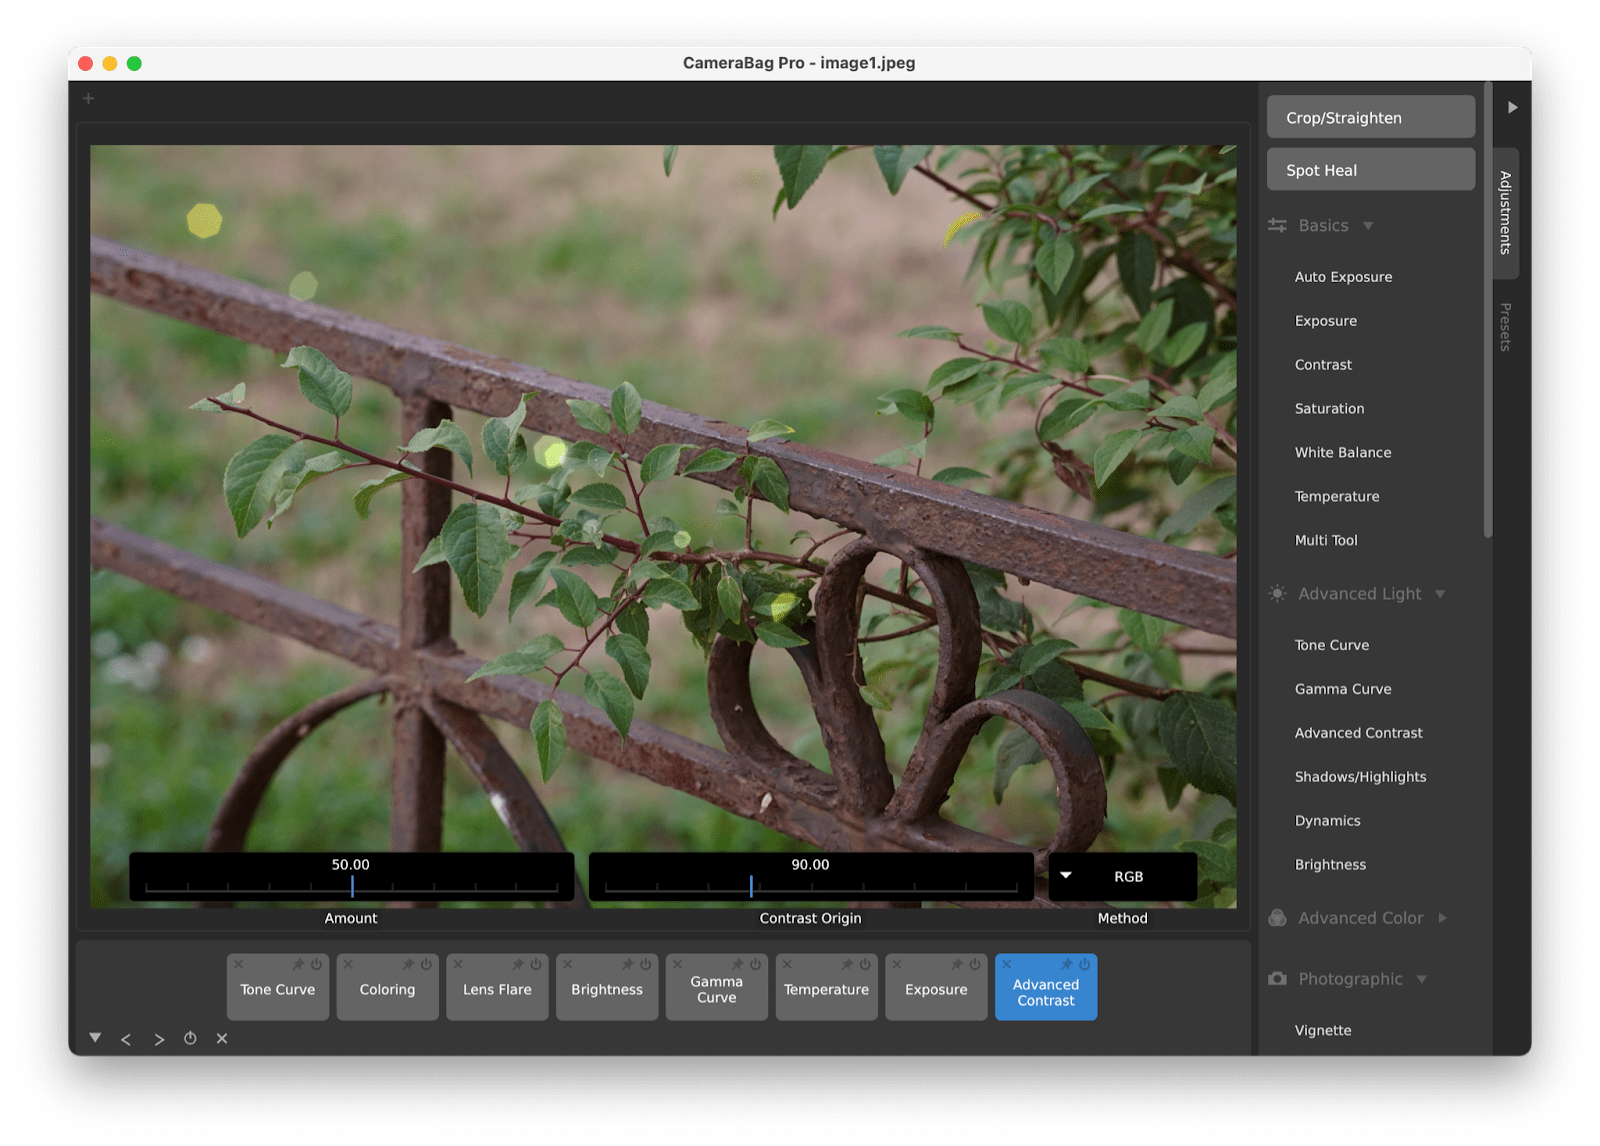
If you’d like to apply the same light and color enhancements to multiple images in your batch, you can try CameraBag Pro, it goes beyond editing a single image on Mac and allows you to save your presets to apply to other images. Just edit your image as you want and then go to Presets tab and click Save Preset...
CameraBag Pro also has vast photo editing tools and even adding watermarks to your pics.
Quickly retouch and correct red eyes in Photos
Photos app Adjust menu also has retouch and red eye correction tools that you can use. Click on the brush icon next to the respective menu, move the thumb along the slider to adjust your brush size, and then apply it to your photo:
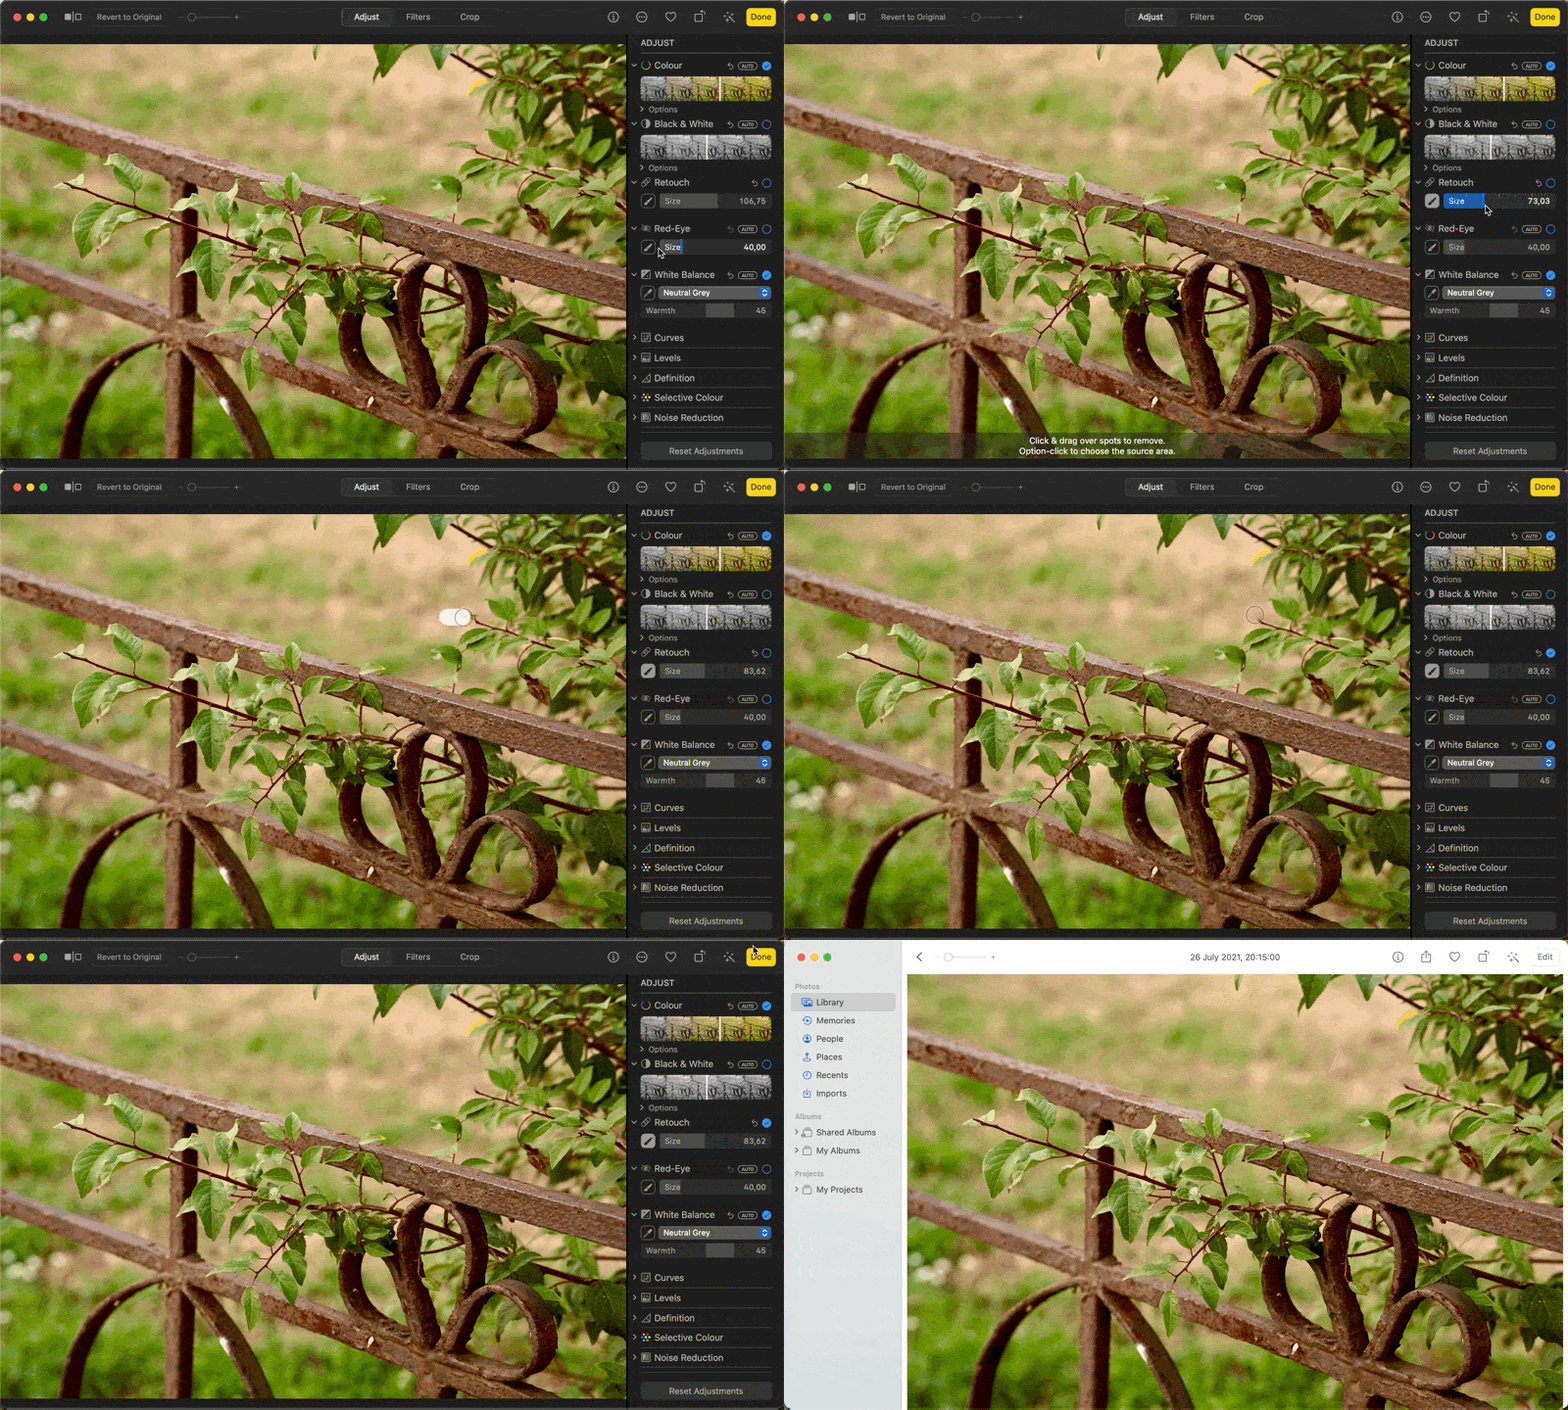
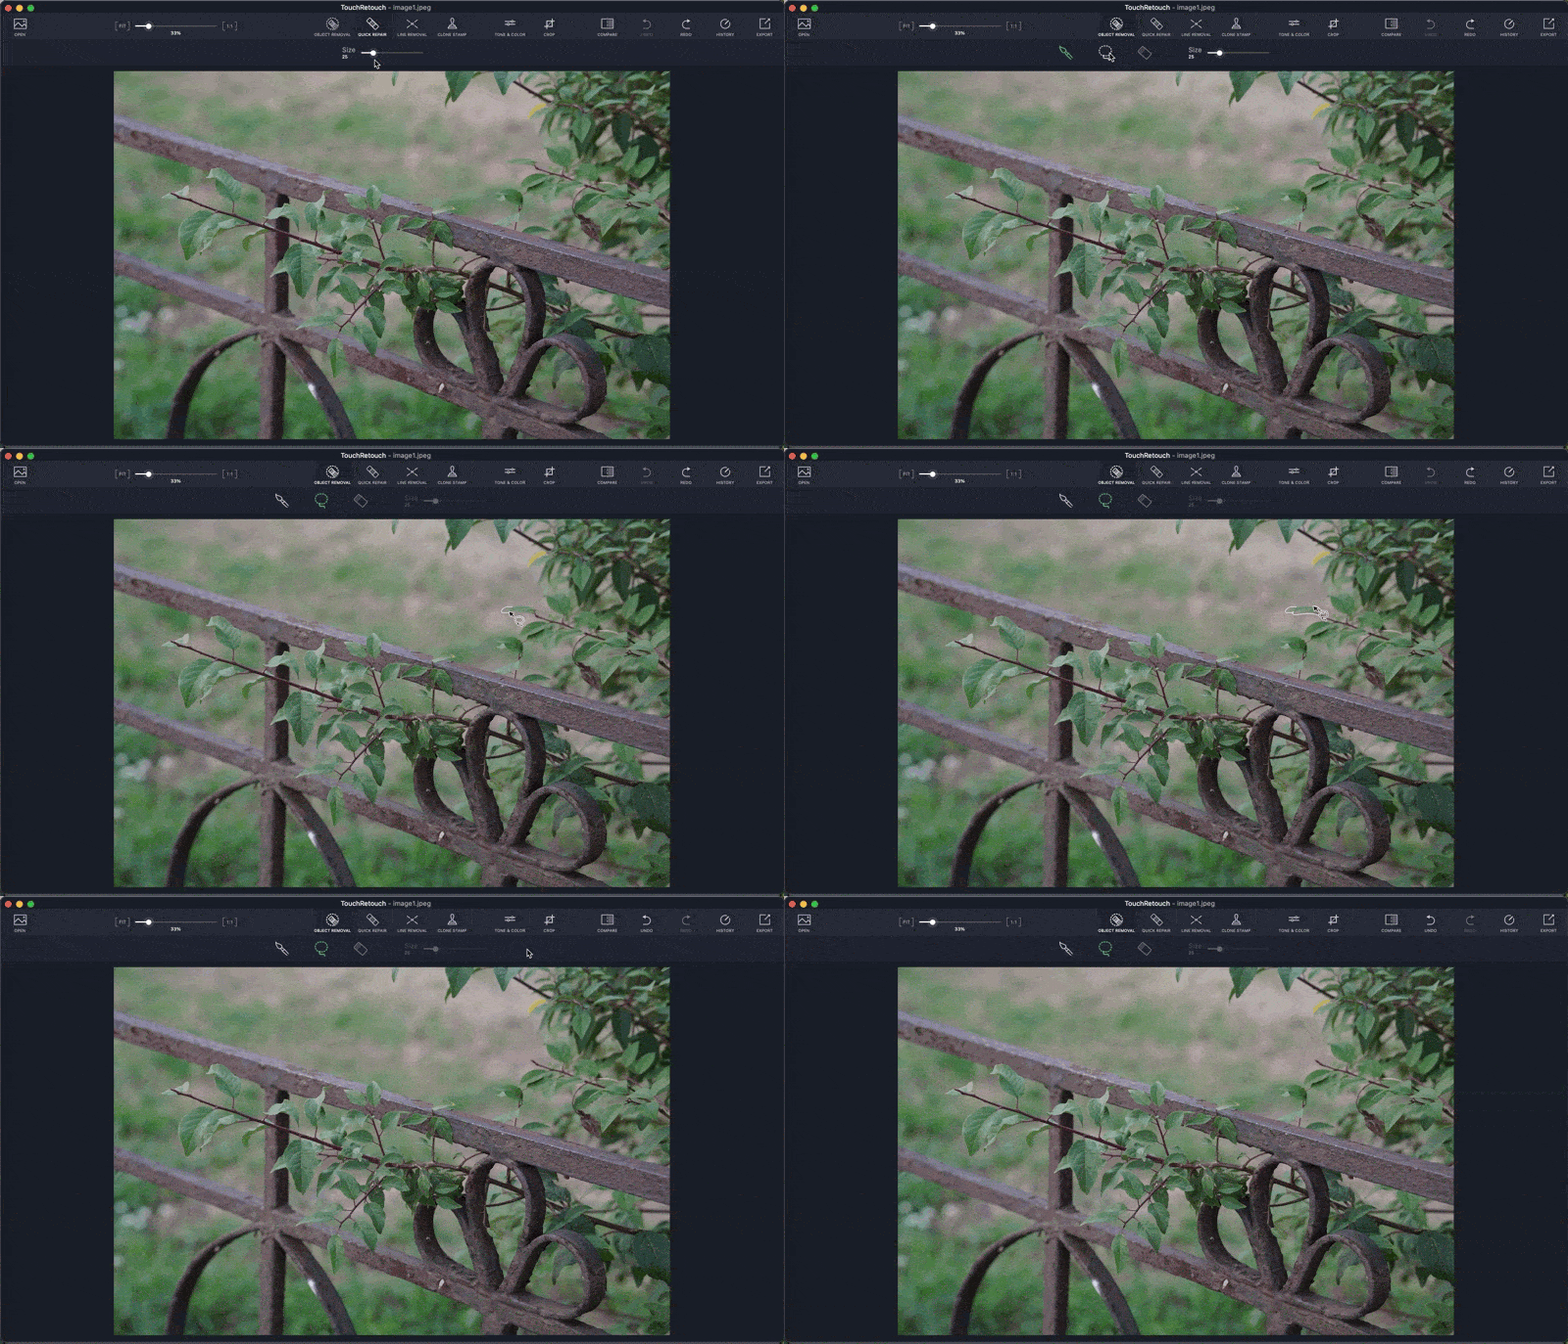
Alternatively, you can use a dedicated retouch tool TouchRetouch.
This dedicated retouch app provides precise and versatile retouch, clone, line and people removal tools. Explore the app if you often find yourself cropping or blurring out unwanted items from your shots.
Make your photos sharper and reduce noise
If you want to increase the sharpness of your shots, you can do so in the Photos app just by scrolling down to the bottom of the Adjust menu and spotting Sharpen.
You can set Intensity, Edges, and Falloff for your sharpening or simply click the AUTO label to let the app choose the best combination for you:
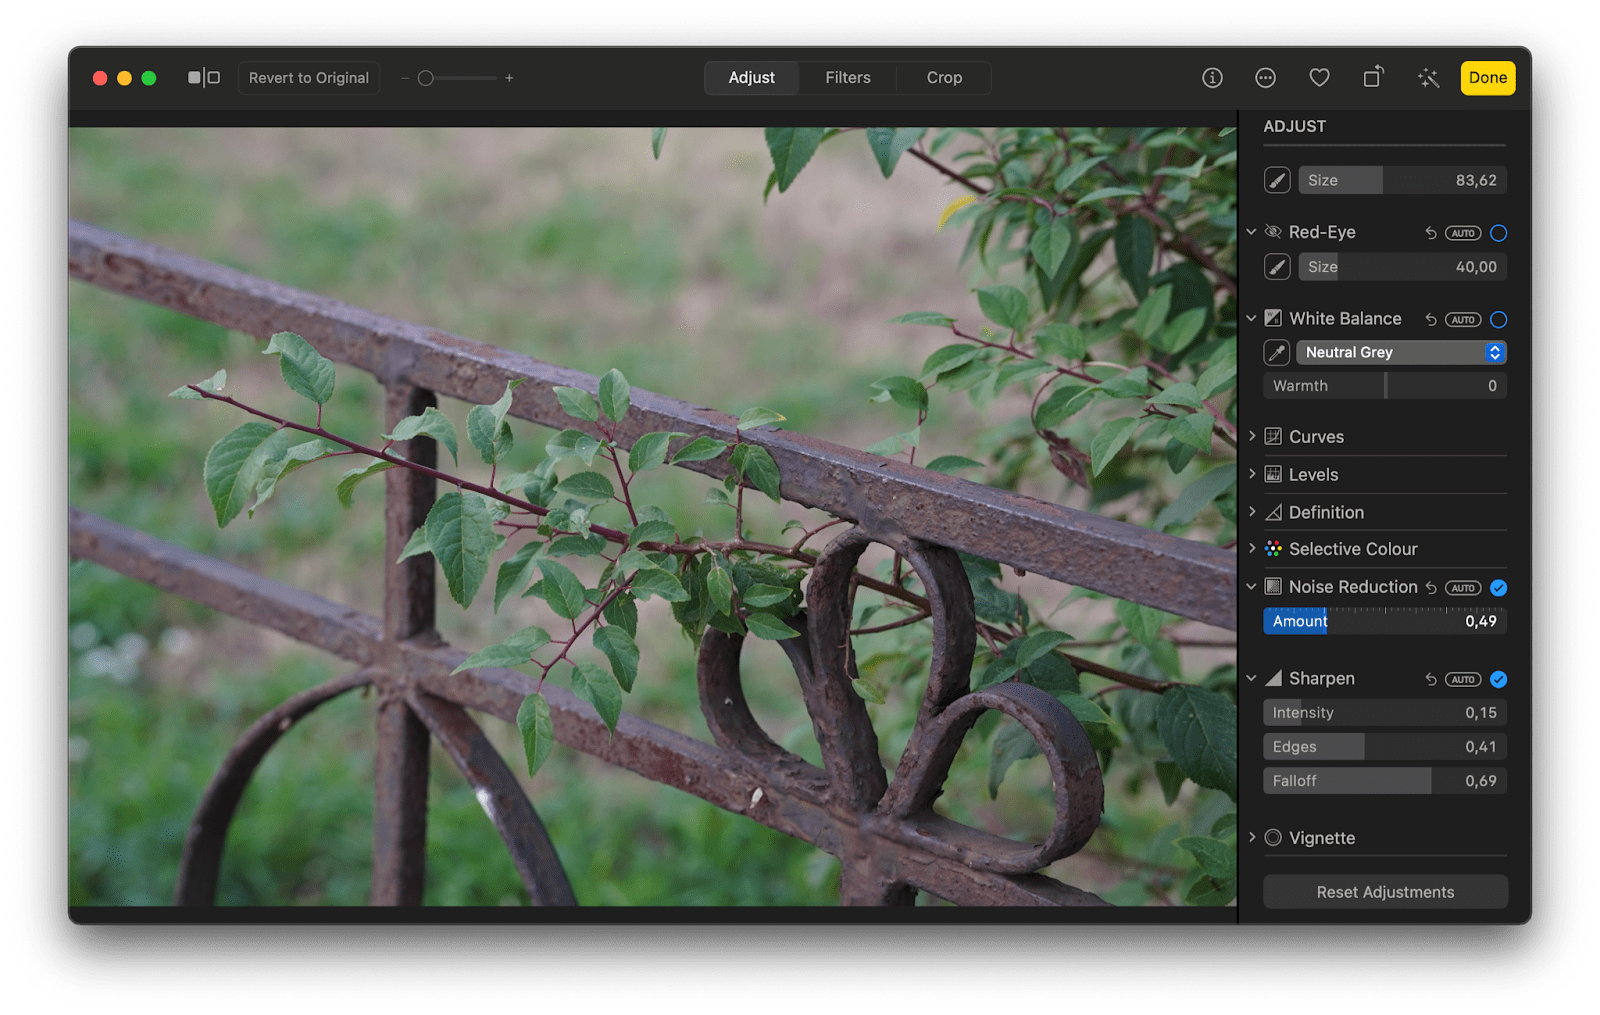
For shots taken in poorly lit environments, you might want to also use the Noise Reduction tool in the Photos app. It’s located right next to the Sharpen tool and all you have to do is move the thumb along the slider to pick the right setting for your image.
If you don’t feel like manually adjusting any of the image editing settings individually, you can simply use the AI Enhance tool, which you can find under Edit in the Luminar Neo app.
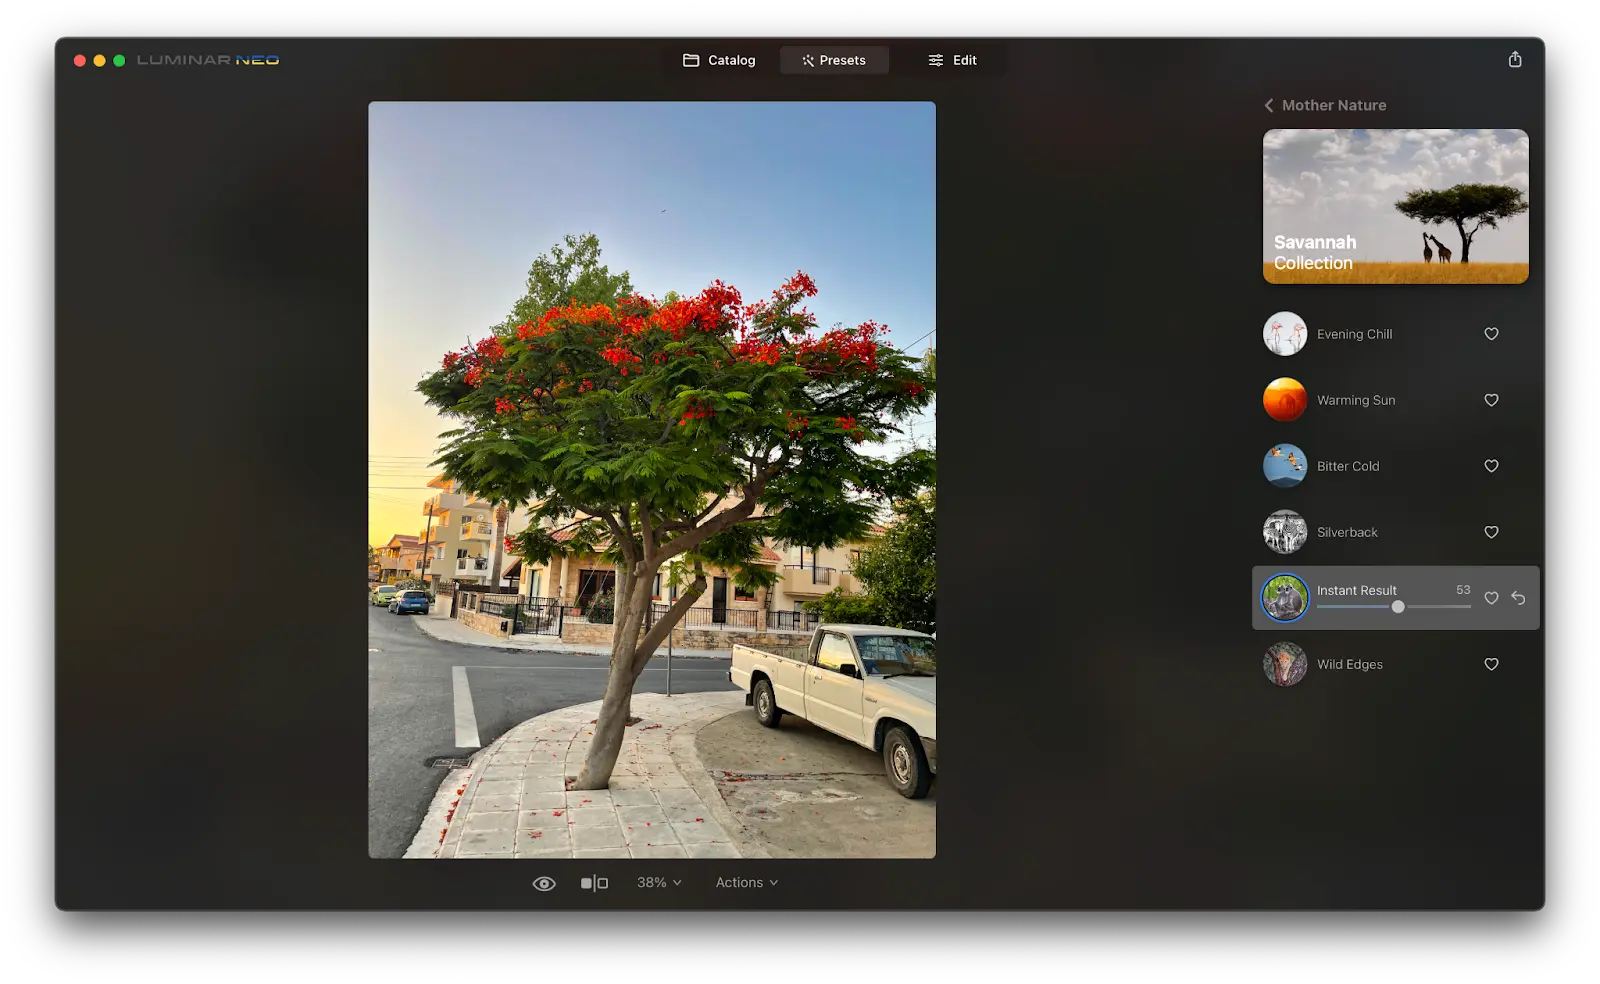
Speaking of Luminar Neo, the app also has plenty of handy tools for refined Macbook photo editing, including Supersharp extension, AI Skin enhancement, AI Body enhancement, and a number of presets you can apply to images and tweak to your liking.
Fix color balance
One of the most common mistakes when taking pictures is getting a shot with colors that look off. Be it the wrong white balance setting, your camera’s hardware or processing limitations, or something else, learning how to fix this is a vital part of figuring out how to edit photos on Mac.
When editing your image, you can tweak its colors and change white balance to fix the issue and either make your image look more realistic and close to what you saw when you were taking it, or on the contrary, add a mysterious, otherworldly feel to the shot.
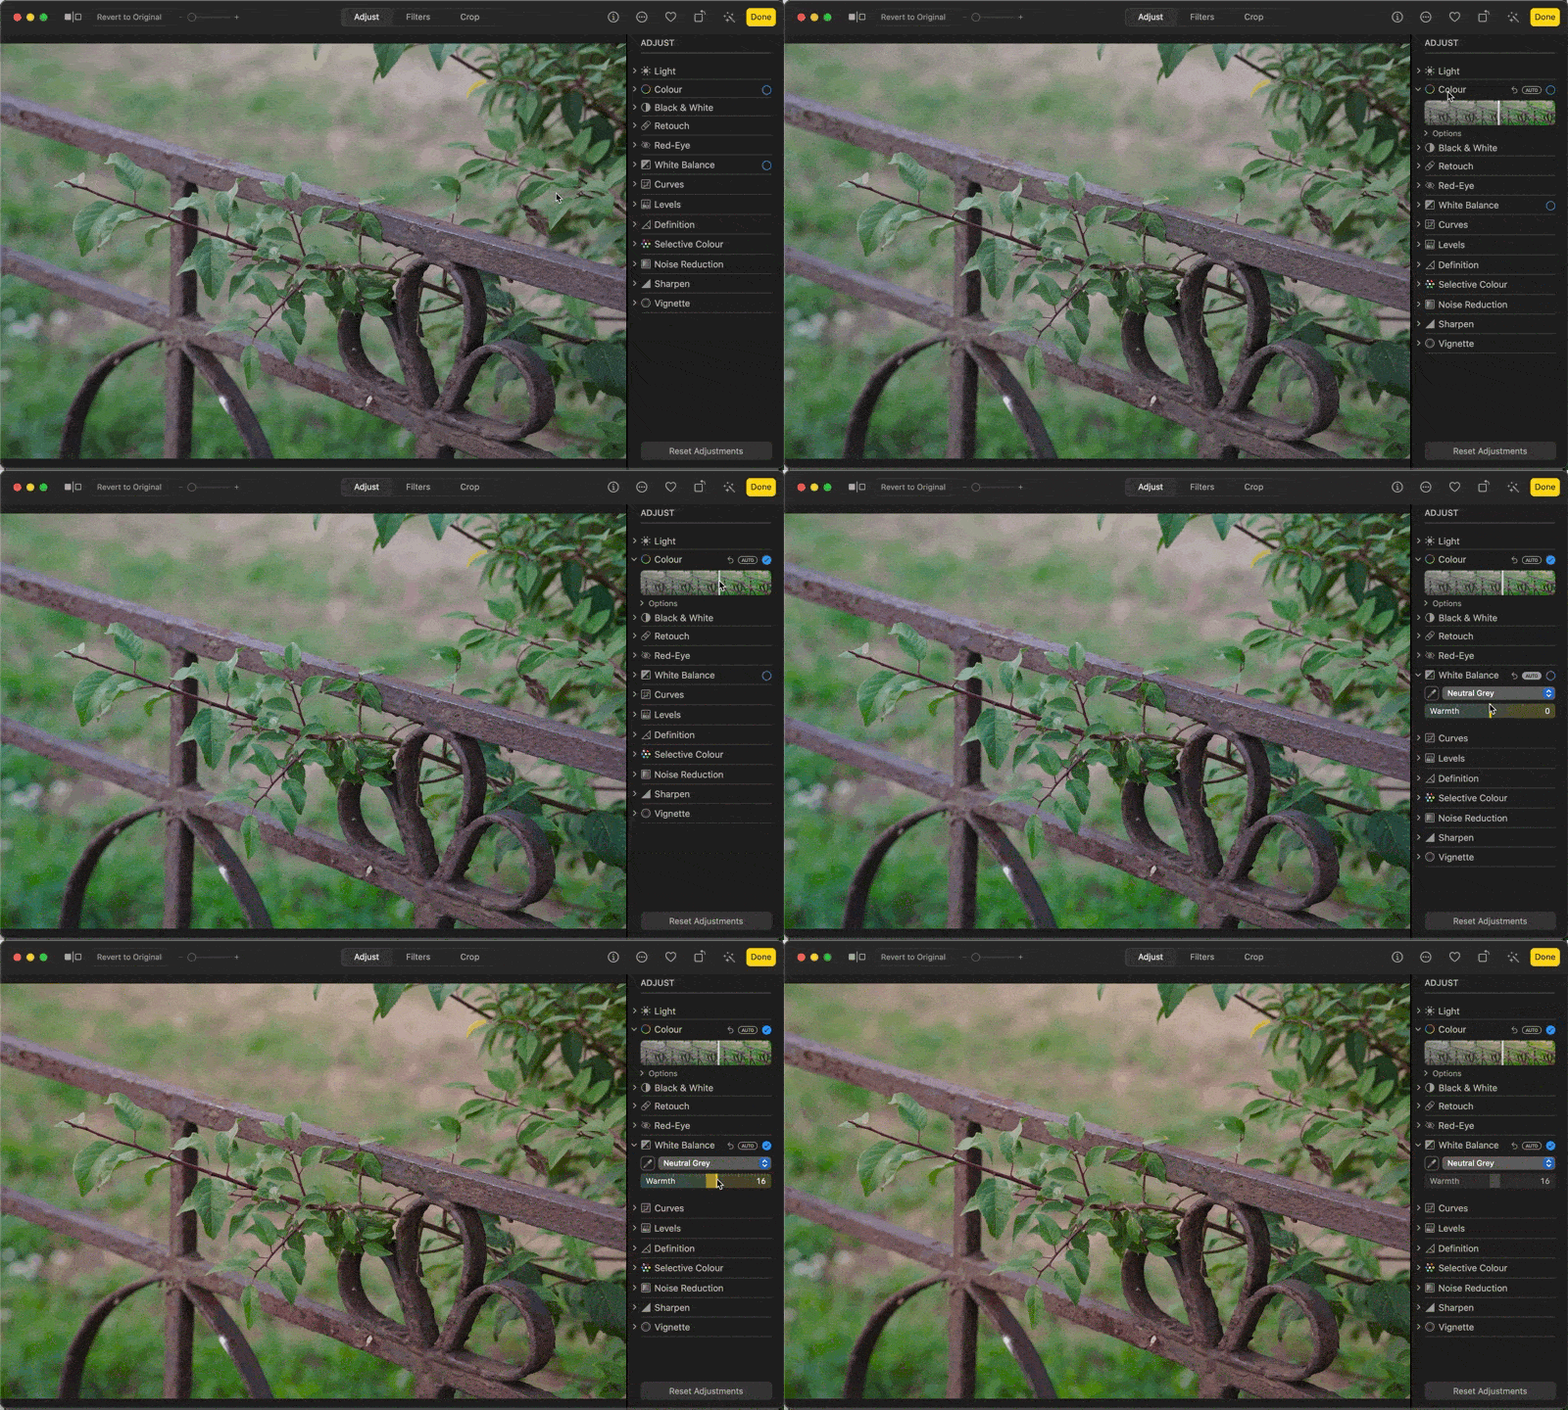
Here’s how to edit colors in Photos:
- Open Photos app from Dock or Finder > Applications.
- Drag and drop your photo onto the app.
- Click Edit in the top right corner.
- Go to Color and adjust the thumb on the slider to make changes manually or press AUTO for automated change.
- Alternatively, you can go to White Balance and move the thumb along the Warmth slider or press AUTO for automated change.
How to use Selective Color in Photos
Selective Color is another amazing photo editing feature that allows you to make very precise color corrections in your image. To find it, open your image in the Photos app editing mode as shown above and find Selective Colors menu in the Adjust tab.
Move through the suggested color options to tweak hue, saturation, luminance, and range for the suggested colors. Additionally, you can use the color selecting tool in this menu to manually pick a color in your image and adjust its hue, saturation, luminance, and range as well.
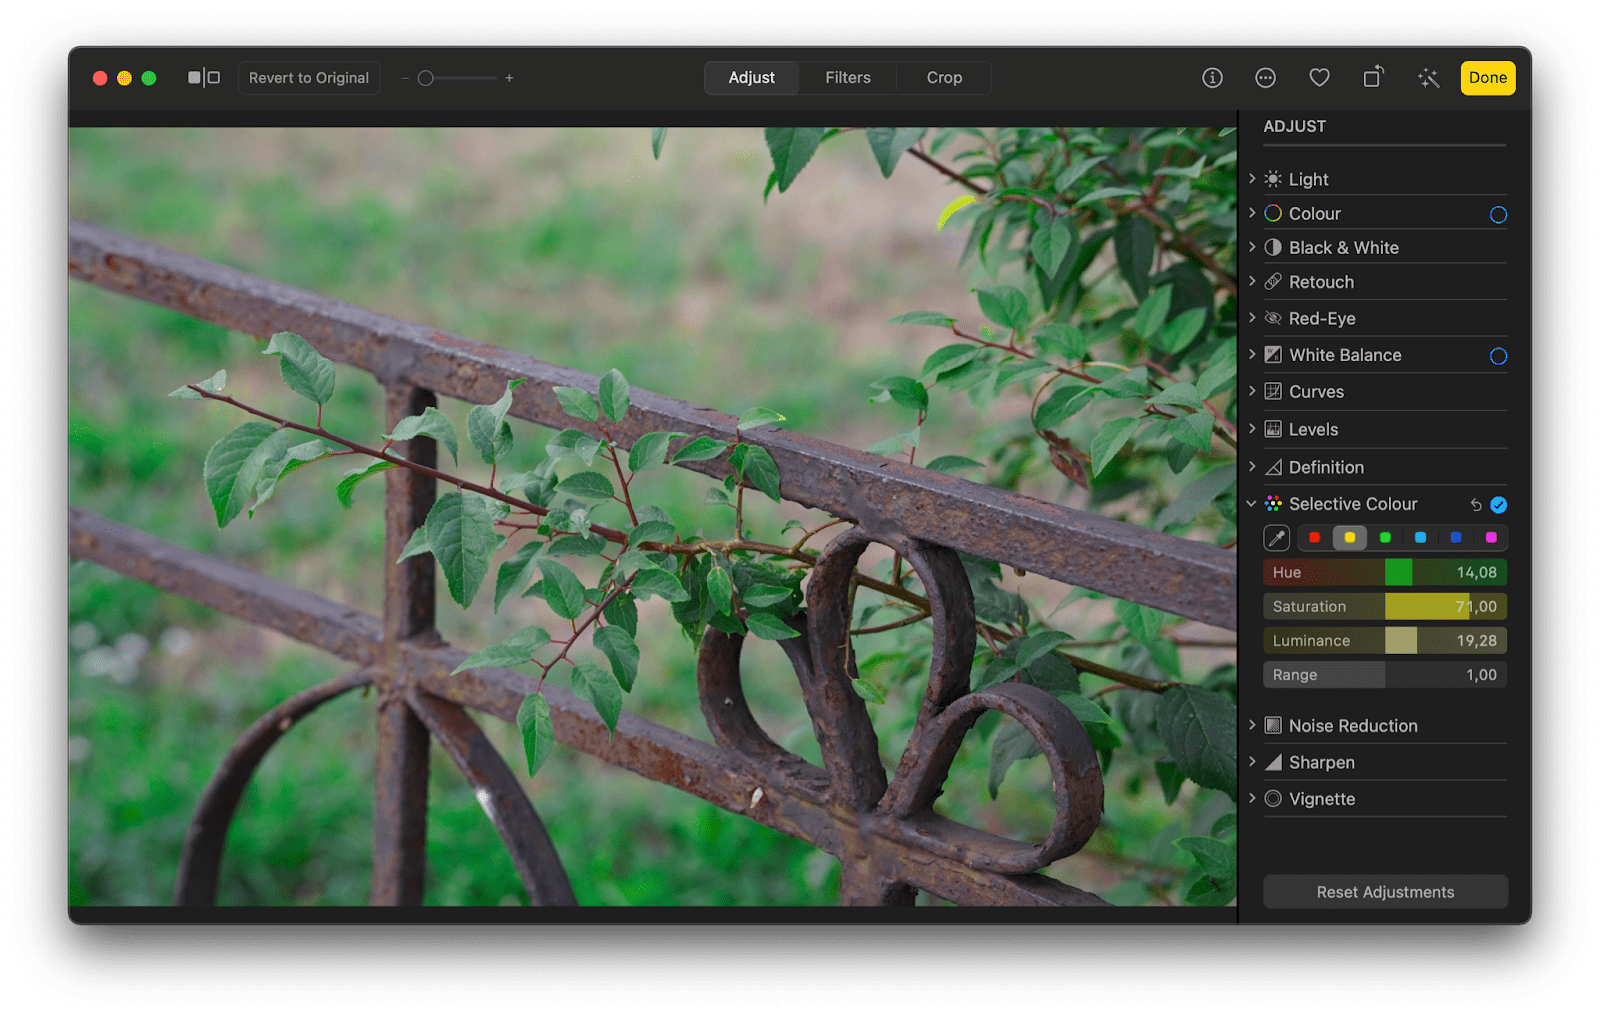
Photo effects and filters
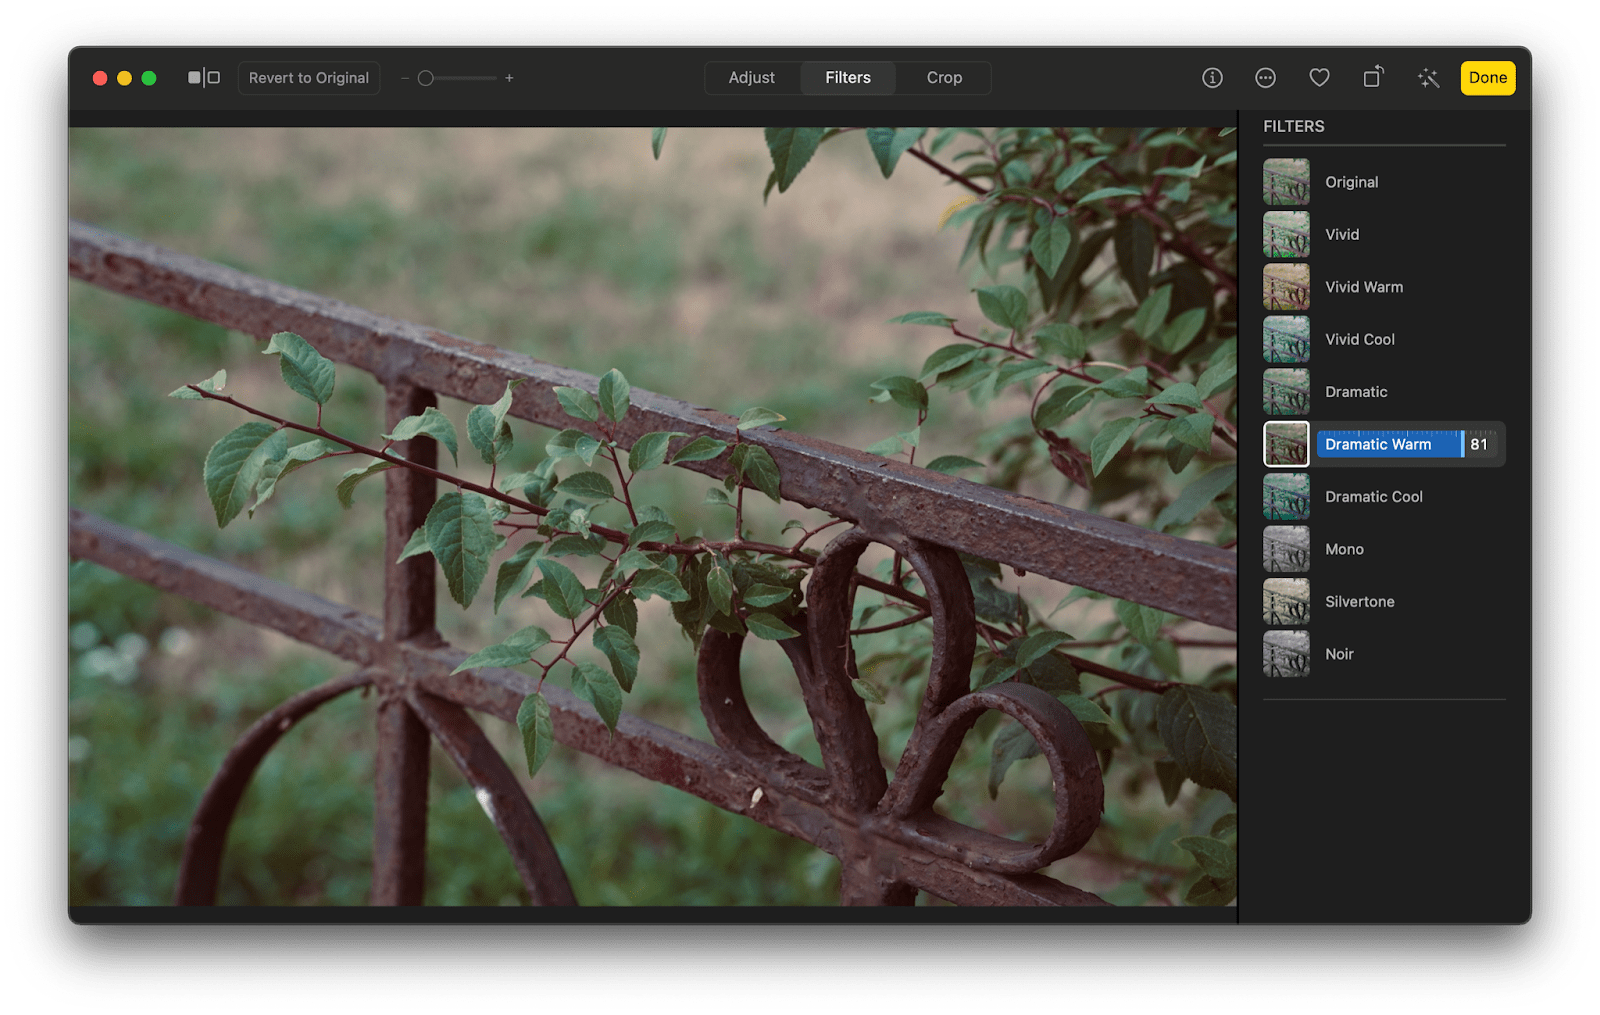
But how to edit in Photos if you don’t feel confident or don’t have the time to change all the image settings individually? Just use filters! Plus, filters can add specific moods to your shots which you might not know the exact settings for otherwise.
To use Photos app filters, go to the Filters tab in the app window and pick the one you like. Move the thumb along the filter slider to adjust filter intensity:
To expand your options when it comes to filters and effects, you can explore the apps we’ve already talked about above.
CameraBag Pro has dozens of presets for numerous photo occasions: interiors, night city, sky, and buildings, black and white shots, a series of classic photography presets, various color correction presets, sunset, snow, underwater, beach, autumn, pop art, portrait presets, and more. Find them in the Presets tab to the right of your editing window in the app.
Luminar Neo offers Presets that can be used on your images either as is, or tweaked. The app has a number of Presets for street photography, portraits, landscapes, and more. You can also add effects to your images with AI Sky Enhancer, Portrait Bokeh, and others.
How to edit photos using Preview app
If you want to do just a few basic edits, like crop your image, add an arrow, underline or circle a part of the image, and add some text, use Preview. This built-in Mac app opens by default when you double-click on an image in Finder.
To edit the image in Preview, simply click the pen tip icon in the top right corner of your window to prompt the image editing menu:
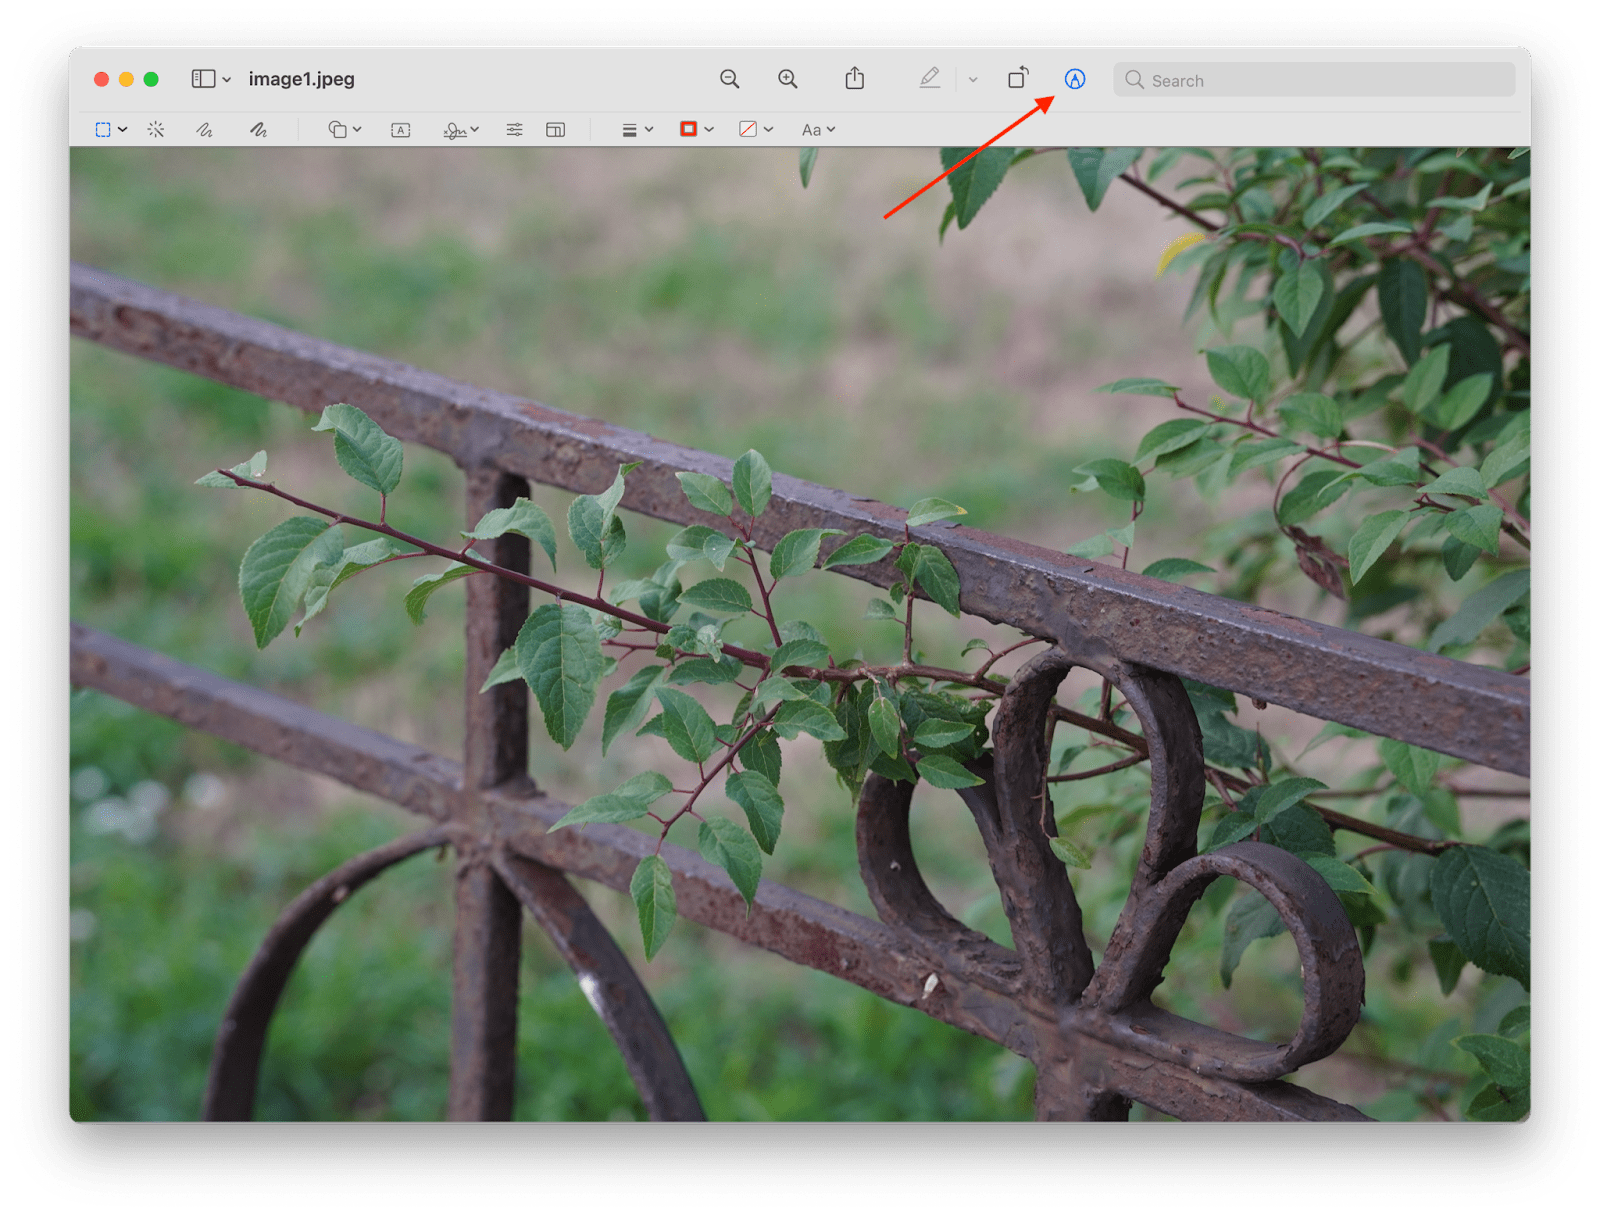
Here, you can resize your image, add lines, text, arrows like the one above, crop, and more. Preview is great for basic image edits for a presentation, to send to a colleague, explain a concept, or report a bug.
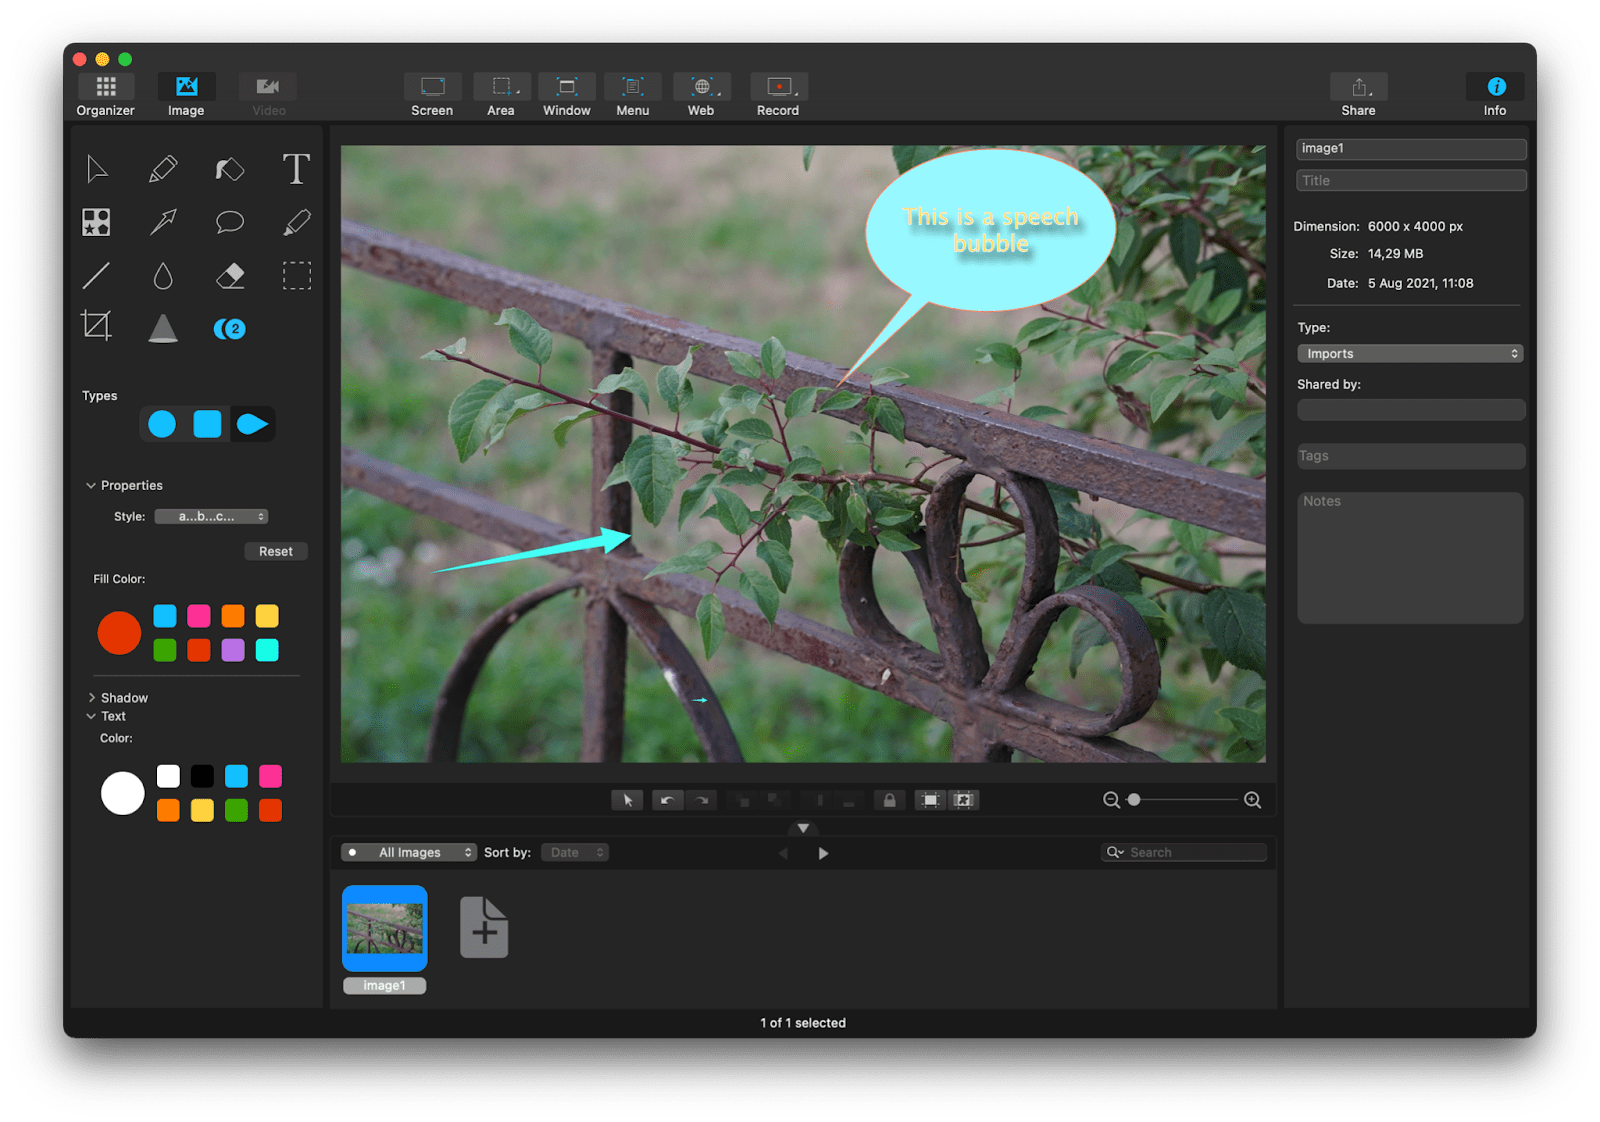
To create comprehensive educational or informational images, you can also try Capto. This screen recording app can also perform basic edits to videos and images, including adding speech bubbles, lines, text, and other artifacts to help you drive a point home:
Batch resize photos in Preview app
To resize a batch of images, you can use the Preview app. Here’s how to do that:
- Open all your images that you need to resize in a folder in Finder.
- Select all the images and double click.
- Select Open With and choose Preview.
- Once your images open in the app, select them all by pressing Command + A.
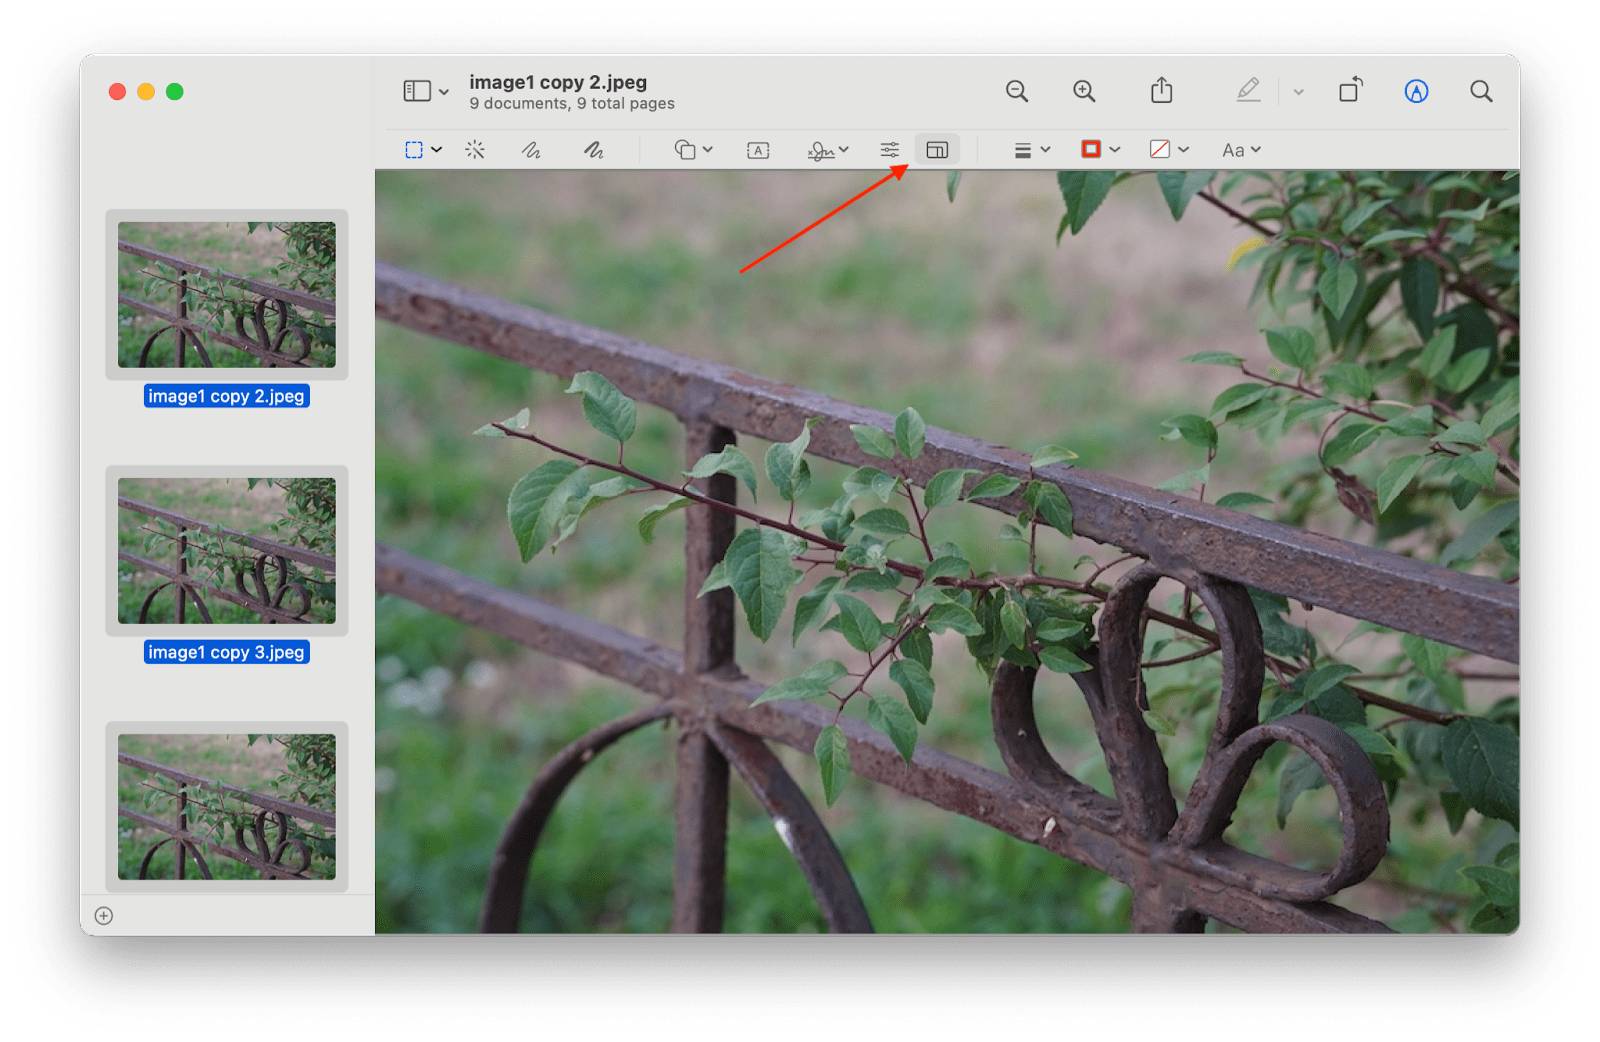
- Press the pen tip button at the top of the window to open the Preview editing mode and click the Adjust Size button:
Type in the size you want for your final images in pixels, inches, cm, percent, etc. Note that the changes will apply to your existing images, so create backups of the original sizes if you need them. Once your images are backed up or you don’t need them in original sizes, click OK to resize.
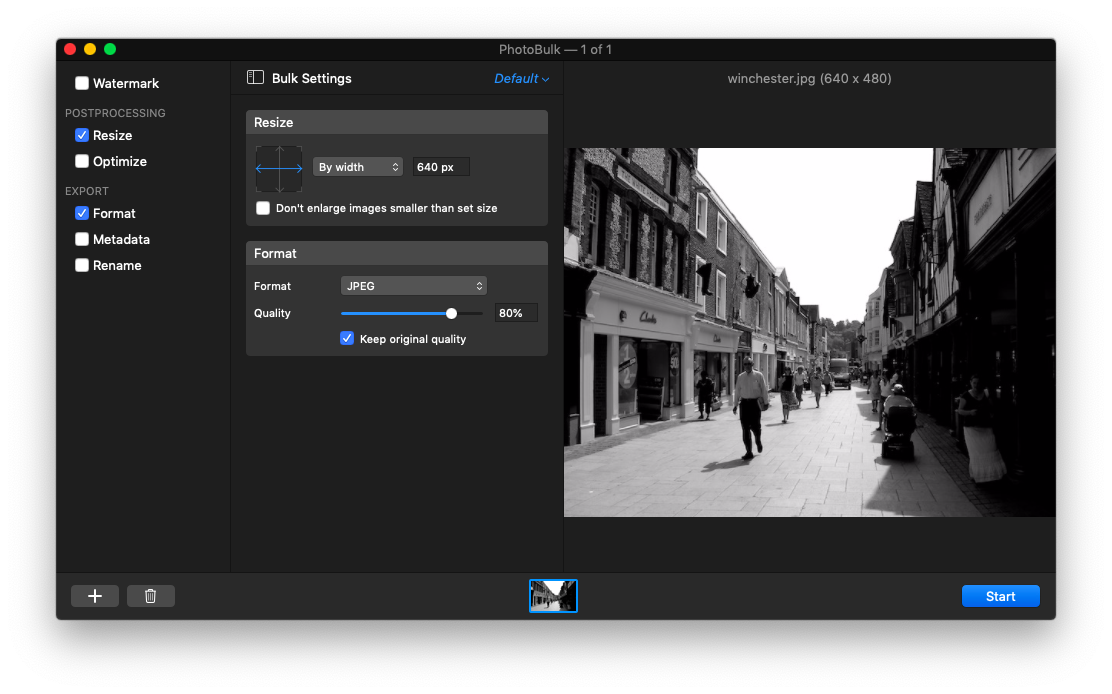
You can also use PhotoBulk app for resizing your images in bulk, as well as adding watermarks, renaming, and more in one fell swoop:
Conclusion
Editing photos on your Mac is an easy and quick process, once you master the tools available to you. Picking the best image editor can take a few tries, but once you work out the flow that works best for you, familiarize yourself with the features of your photo editing software, and have go-to editing presets, you’ll know exactly which tools work for you.
Hope our guide helped you discover how to edit your image on Mac in the most convenient way for you, and if you feel like exploring any of the mentioned third-party apps, you can do so with Setapp.
Setapp offers a collection of tools for your daily tasks under a single subscription. Discover Luminar Neo, PhotoBulk, TouchRetouch, CameraBag Pro, and Capto with your Setapp subscription or try with a 7-day free trial.


