How to crop a video on Mac: My picks as a beginner
I must admit — I’m pretty helpless with video editing. Yet, after starting my YouTube channel, I have to be hands-on with most editing tasks, including video cropping. Without user-friendly editing apps, I would be hopelessly lost. But thankfully, I found some that compensate for my lack of editing skills. In this guide, I will share the video croppers I’ve tried.
Why crop videos?
Of my mind, I can think of a few reasons why knowing how to crop a video can be helpful.
- To remove unwanted objects from the screen. For example, you unknowingly recorded a copyrighted brand at the edge of the screen.
- To reframe your recordings to fit different screens. For example, some videos captured for Mac showed up with black bars on mobile devices.
- To create multiple footage from a single frame and repurpose them for different content.
- To exclude unnecessary parts from the screen, such as the menus at the bottom of a Zoom recording.
Regardless, what’s more important is to find ways that can crop the video effortlessly.
Before explaining how to crop videos on Mac, I’ll briefly compare cropping with trimming. Most people, including me, confuse both. Cropping is a technique that removes unwanted content from a video frame without decreasing the video length. Meanwhile, trimming is cutting the video off, which shortens its duration.
How to crop videos like a pro
You don’t need to be a pro to crop videos. What you need is an app that lets you crop them like one. I found Filmage Editor to be a super helpful video cropper. Filmage Editor is a powerful app that allows Mac users access to professional editing tools.
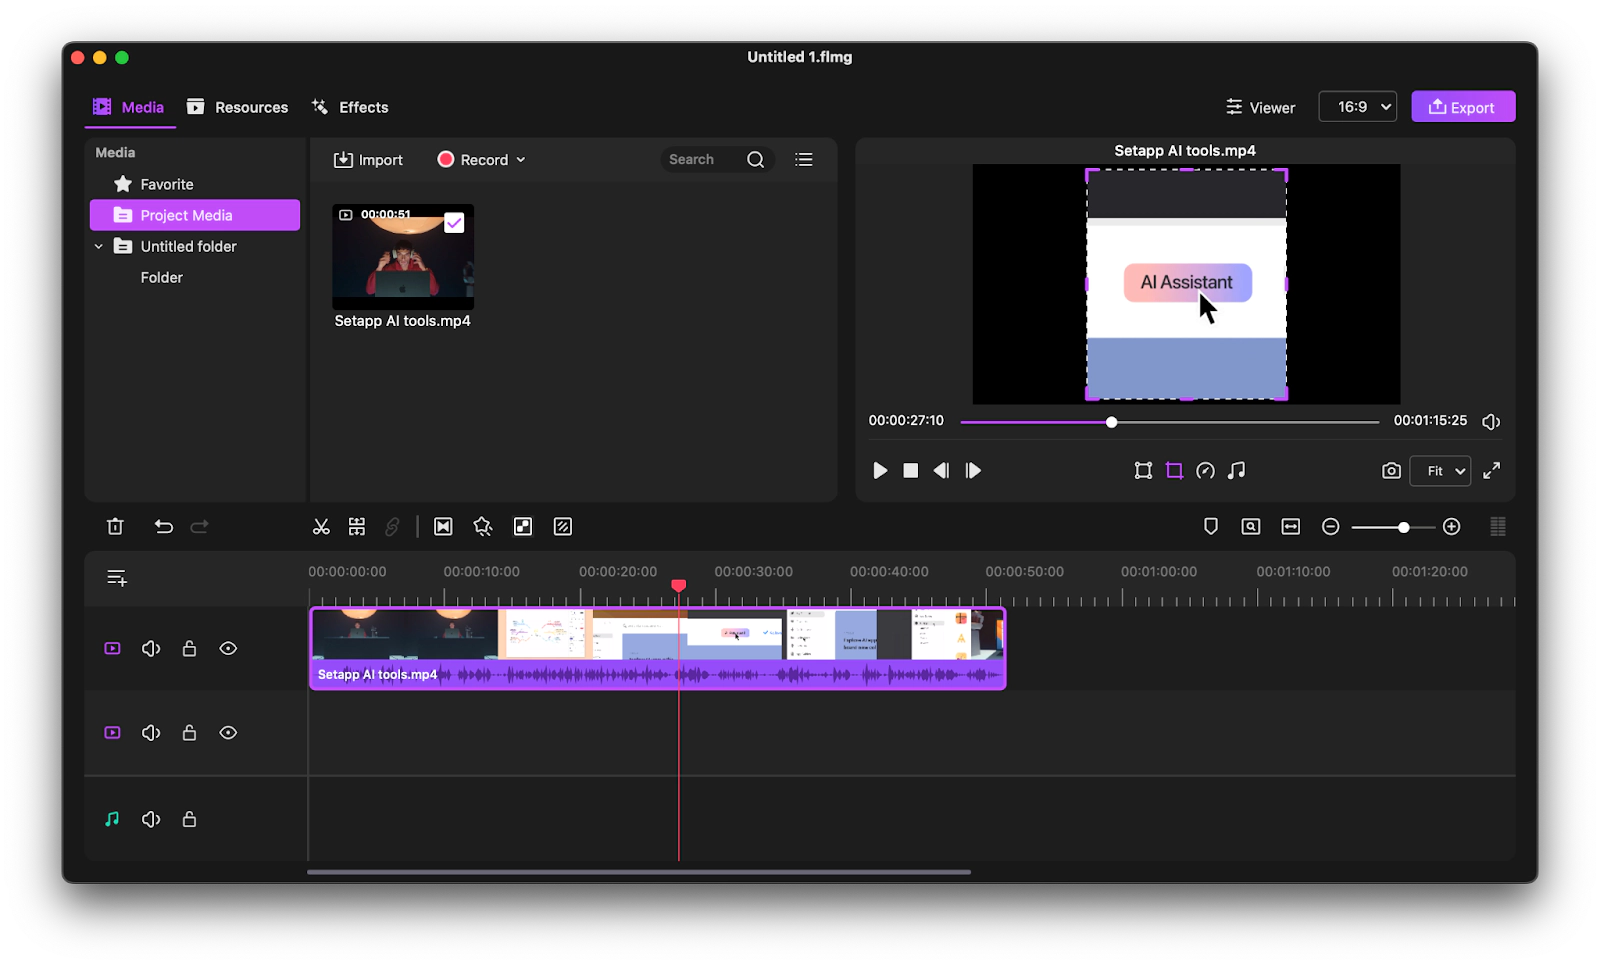
Cropping a video with Filmage Editor is easy. It only takes a few clicks. Here’s how.
- Install and open Filmage Editor.
- Import a video file to the app.
- Drag the video clip to the timeline below. You will see the preview interface loaded with your video.
- Click the crop icon,
- Drag the frame to the area you want to keep.
- Click crop again to remove the unwanted area.
That’s exactly how I zoomed into specific parts of the presentation materials I screen-recorded. The process is not as intimidating as I imagined. But that’s not all. The best thing about Filmage Editor is that I can easily merge different parts of the videos. The app lets me easily resize them for YouTube, Facebook, and TikTok.
Unlike some professional video editors I’ve tried, Filmage Editor has a very shallow learning curve. For example, I spent hours figuring out how to use Adobe Premier Pro, but I can edit my videos almost immediately with Fimage Editor. I like how the app is designed with a user-friendly interface. Although they do provide an extensive guide, I rarely need it, especially for basic tasks like cropping, trimming, or merging.
How to crop part of a screen recorded video on Mac
Ever had trouble cropping a portion of your recording in an exact ratio, such as 16:9 or 7:5? To get around this problem, I record my screen in the ratio I need right from the start. These days, I use CleanShot X if I need this. Here’s how it works.
- Download and install CleanShot X.
- Click CleanShot X icon in the menu bar.
- Drag any part of your screen. You will see an app’s menu that prompts you for further action.
- Click the Crop icon to further resize the area you want to crop.
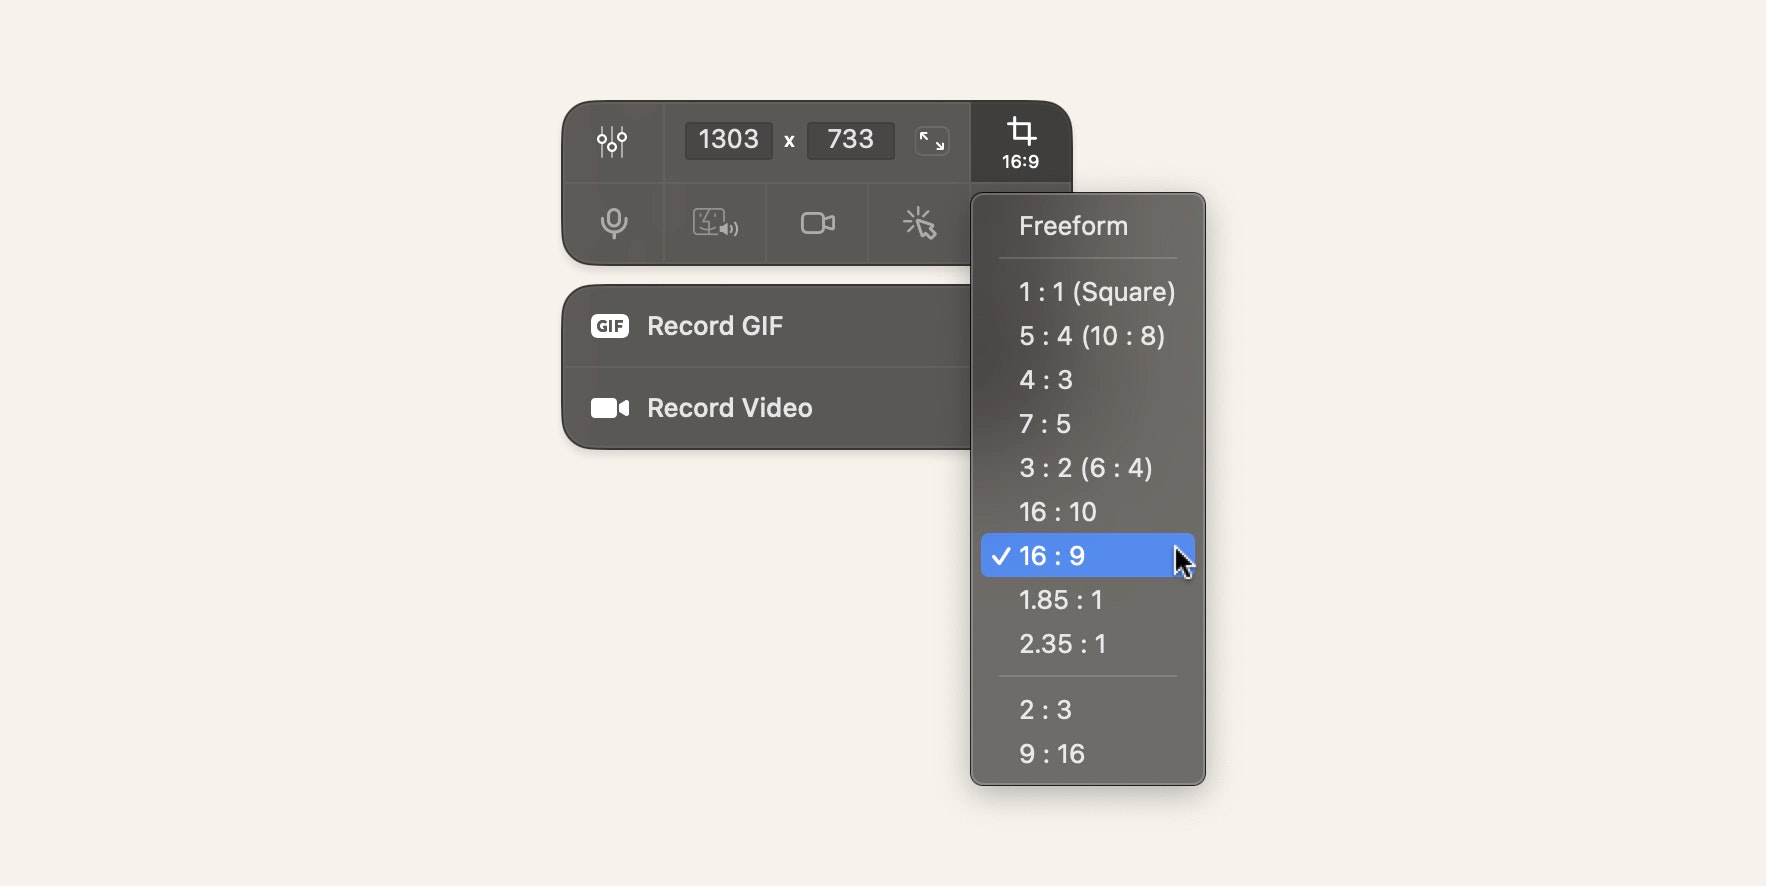
- Then, choose whether to include the computer audio, mic, or camera feed in the recording.
- Select Record GIF or Record Video to record in the respective format.
- Click Save at the bottom left of the screen after you’ve captured the desired footage.
Before saving the clip, you can trim the video, adjust the volume, and choose the resolution. You can also save the recordings to the cloud to share them with others.
How to crop video in iMovie
Chances are, you’ve come across iMovie on your Mac. It’s a pretty nice movie editor. If you need to crop a video, for example, after a screen recording, you can do it with the iMovie app. Here’s how.
- Open iMovie.
- Click File > New Movie.
- Then, click on the Import Media button.
- Select the movie you want to crop from your drive.
- Click and drag the loaded movie to the timeline below.
- Once loaded, you will see the movie in the editing panel.
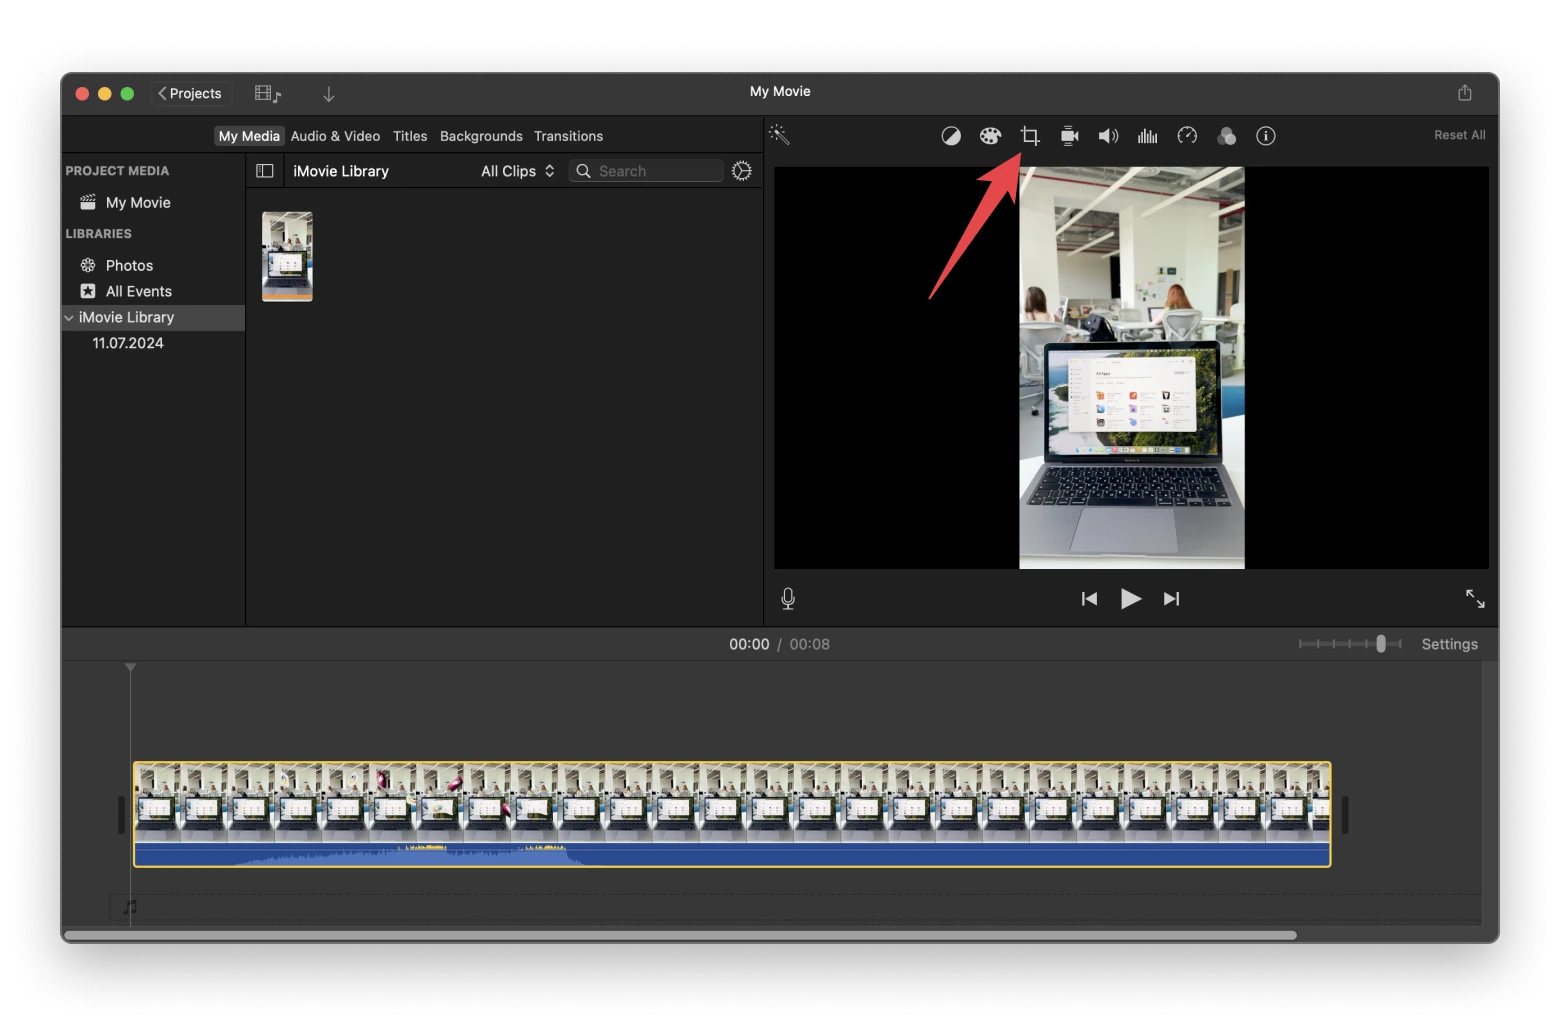
- Click on the Crop icon. You will see a frame appearing over the video clip.
- Drag the frame to the area you want to keep.
- Click the Apply button at the top right.
iMovie has a special cropping option called Ken Burns. It lets you set a start and end area where the video clip gradually transitions. If you’re not satisfied with the outcome, you can easily undo the changes by clicking the Reset button.
On top of that, you can also make other basic edits before exporting the movie. For example, I can cut my video in iMovie to trim down the duration. But if I want extensive features like filters and text effects, Filmage Editor is my go-to option.
Crop a video on Mac without iMovie
Not a fan of iMovie? Not an issue. In fact, you can find many macOS apps that let you crop and trim your videos.
Crop videos with Capto
A favorite of mine is Capto, particularly when I’m creating tutorial videos for fellow freelancers. Capto lets me record my screen, annotate it, and perform basic edits before publishing them. (If you need a comprehensive guide on how to record your screen, check out our guide here.)
Of course, I can also easily crop the recorded video with the app. These are the steps I followed.
- Install and open Capto.
- Open a video file.
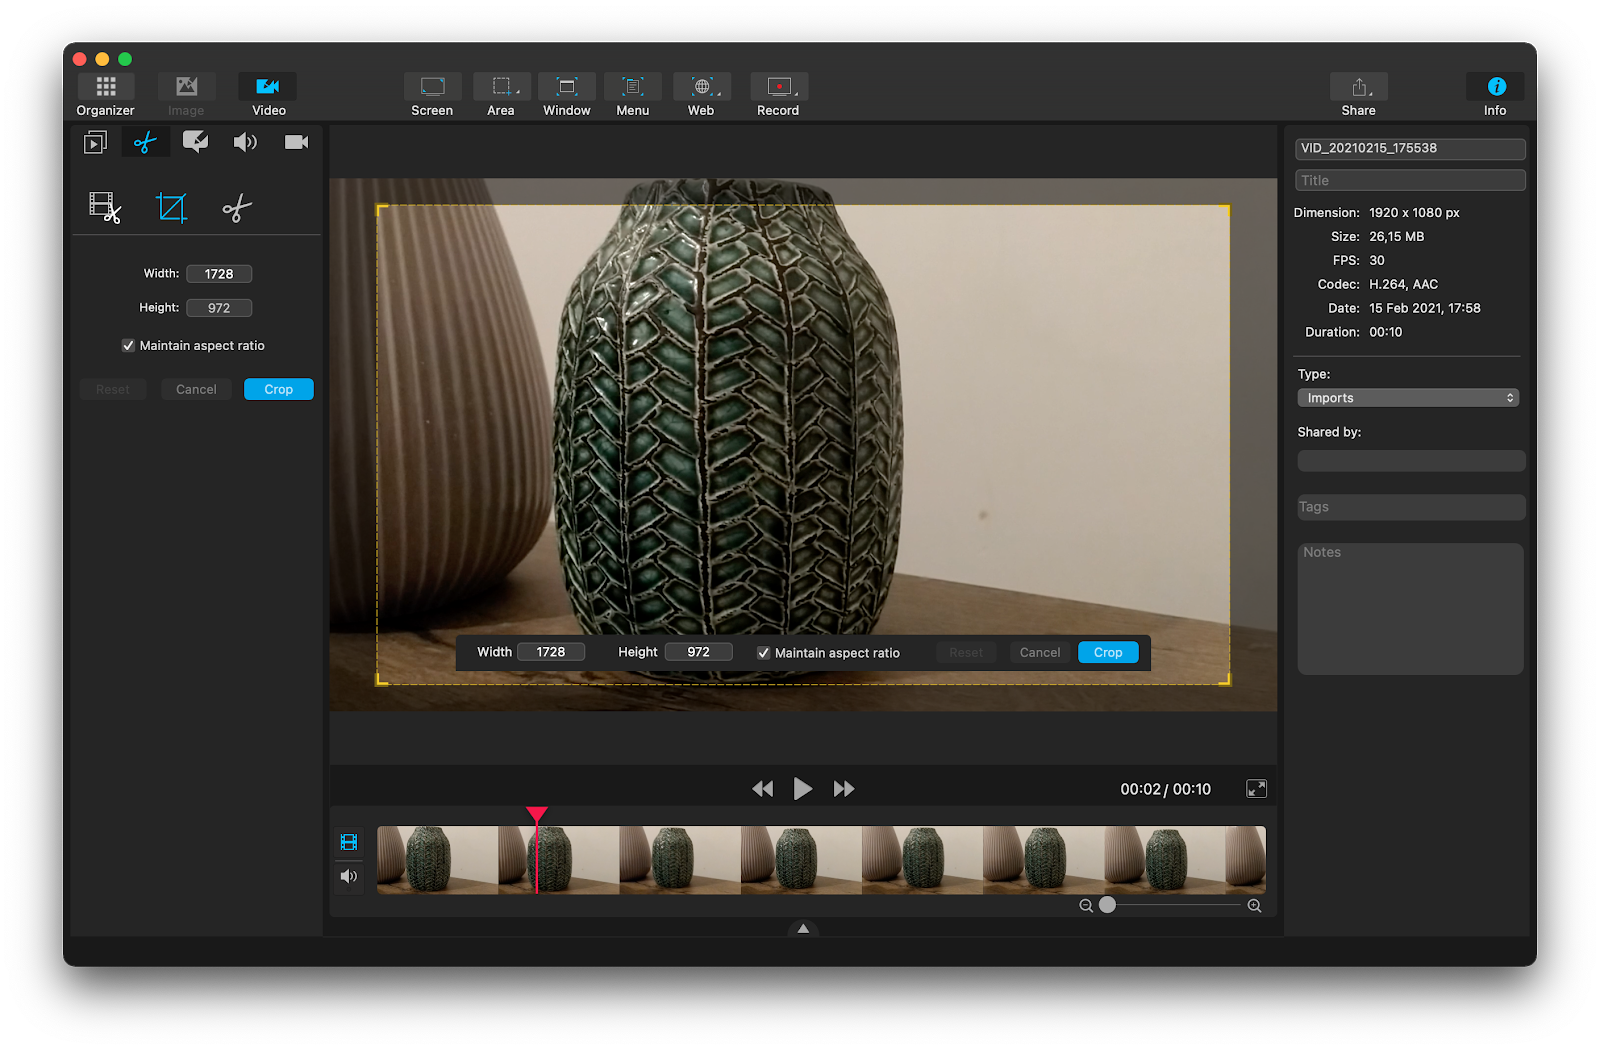
- On the left panel, click the scissor icon to access the editing tools.
- Choose Crop.
- Drag and resize the yellow rectangle to the desired crop area.
- Click the Crop button on the left.
Capto will automatically remove the area outside of the rectangle and fill the editing panel with the cropped video.
Cut video with CameraBag Pro
As I was searching for ways to crop video after a screen recording, I also came across CameraBag Pro. This app is handy if you’re working with lots of photos and videos. If you take lots of videos with a camera, CameraBag Pro is better. But Capto works better if you need instructional videos with your Mac.
You can enhance your videos or photos with dozens of professional filters and beautify them in batches. More importantly, the app makes cropping so simple. All you need to do is resize the frame, crop, and save the cropped video to a new file.
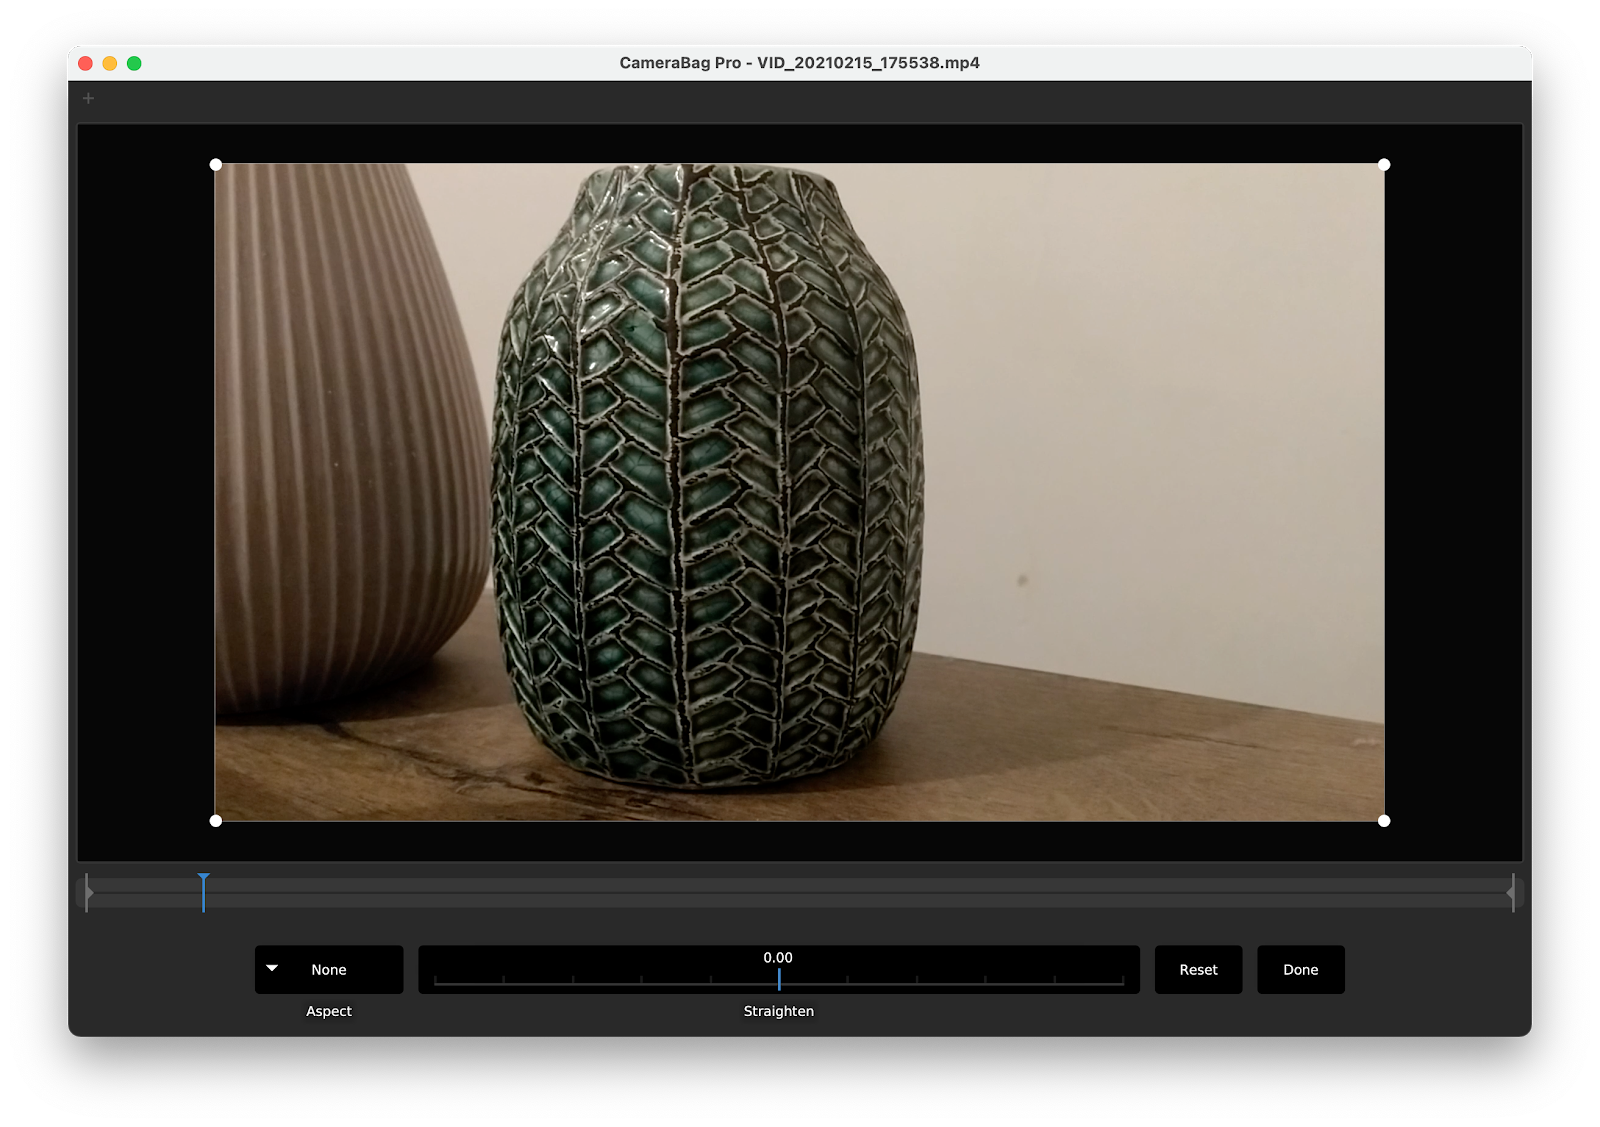
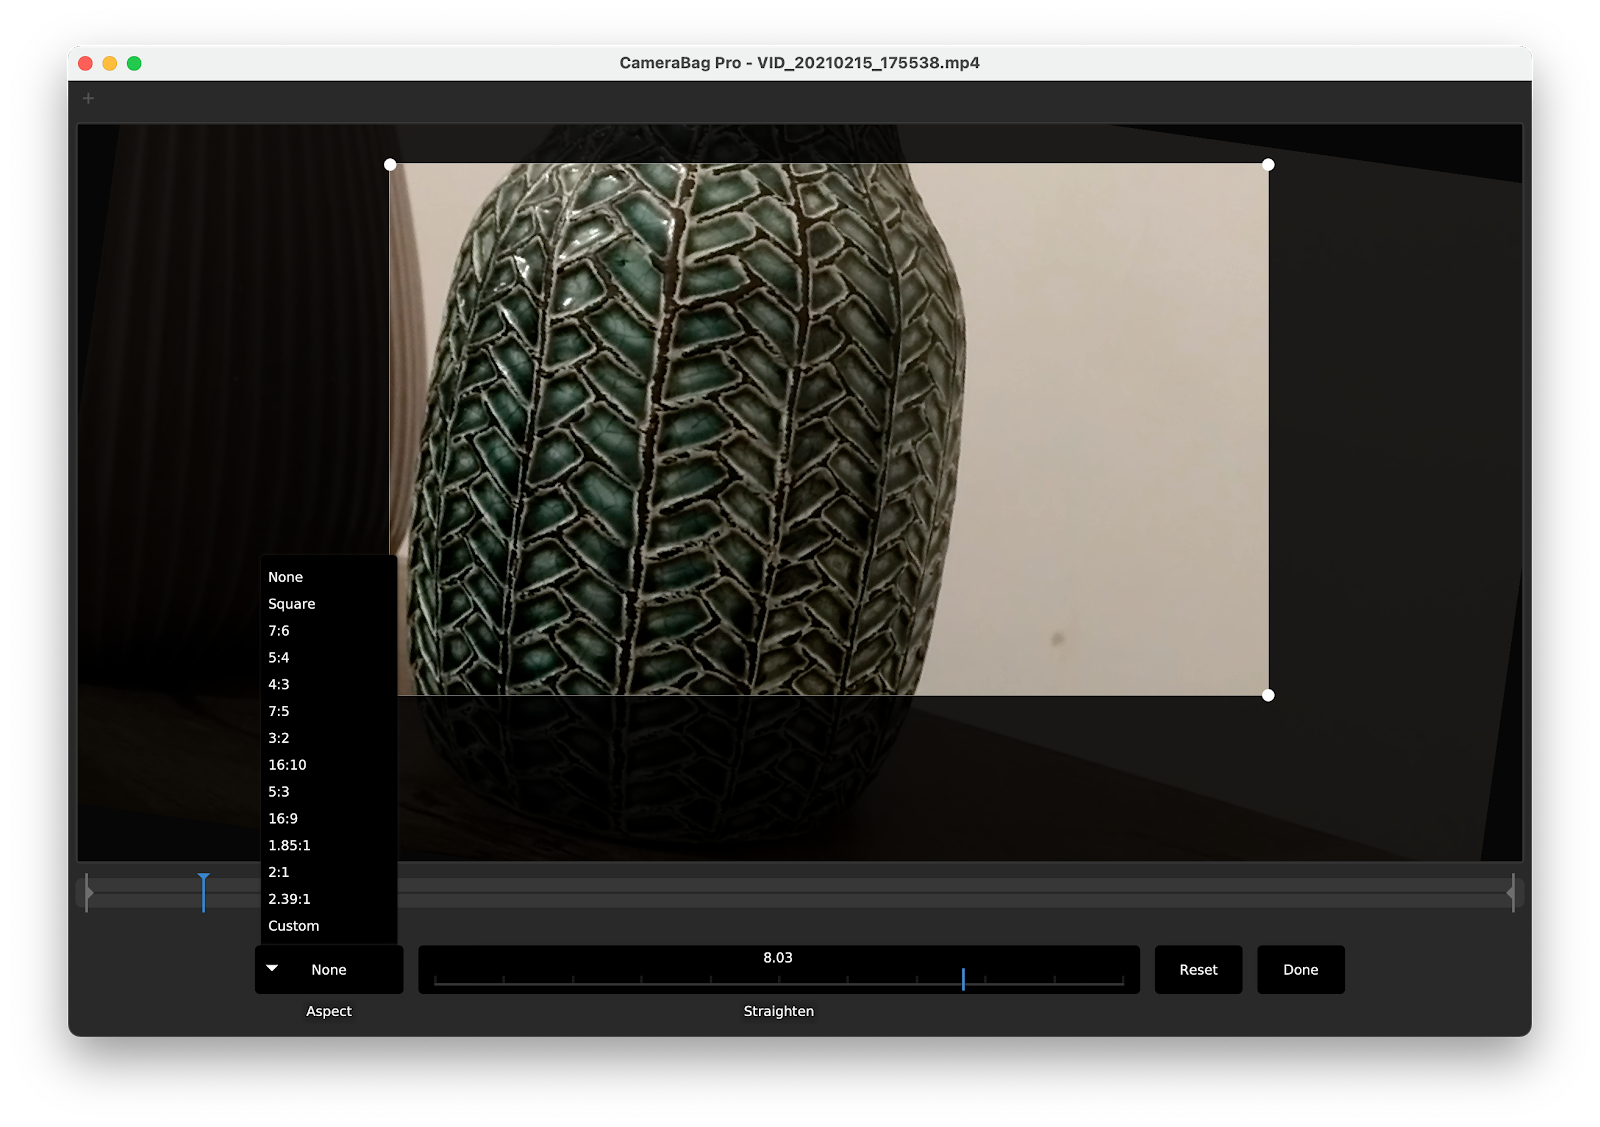
The app has a selection of standard aspect ratios so you can easily pick the one that fits your needs. It also can help you straighten your video if it’s a little crooked.
 To save your edited file, click File > Save as. You will be able to select the file type for your video, name, and location. Output video files include MOV, MP4, and M4V.
Crop video on Mac with Photos
If your Mac is running on macOS 11 and above, you can also use Apple’s Photos app to crop your videos.
- Open the Photos app.
- Double-click on a video.
- Click Edit in the upper right corner > Crop. Then, drag the rectangle frame to the area you want to keep.
- Click Done.

You can find the cropped video saved on your Mac.
Crop a video online
Sometimes, you’re using another device that doesn’t have your video editing apps installed. Worry not because there are several online video and MP4 croppers that you can use.
For example, EZGif is a simple online tool that lets you crop and save MP4 and WebM video files. The caveat is that it limits the file size to 200 MB.
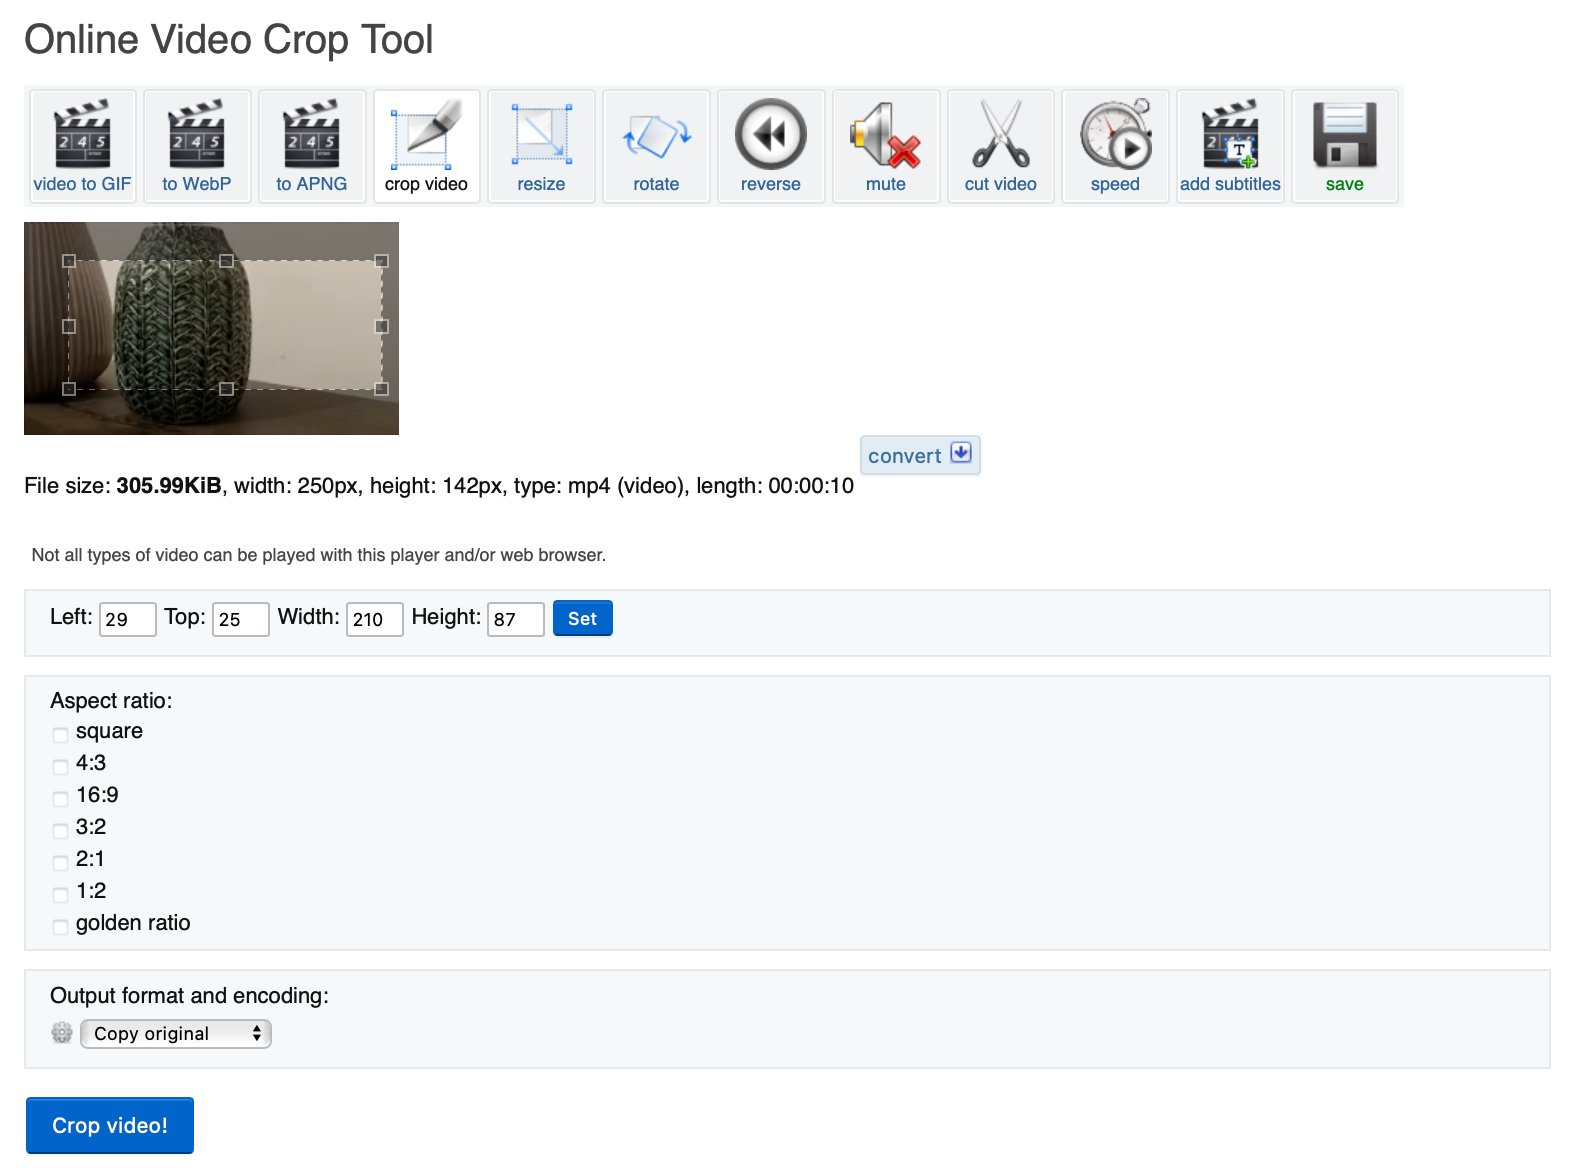
Video Candy is another similar tool. You can use it to crop videos to any size. It also has preset screen ratios that you can instantly apply to the video clip. Like EZGif, there is a limit to the file size.

While online video croppers are convenient, they have very limited features. Many such tools can perform basic editing, such as trim mp3, merge video and sound files, and crop. However, most don’t have advanced features such as layers, transitions, and filters that professional editing needs.
Another concern is security. When you upload your videos online, they’re stored on an external server. Not all online video editors provide strict security measures to safeguard your photos from hacking attempts. Besides, some free online video editors might infect your Mac with malware.
Now you know how to crop a screen capture in simple steps
There are almost endless possibilities in extracting a part of the screen from your recording. But personally, I couldn’t stand wasting too much time on simple edits. Some apps and methods let you crop videos more quickly than others.
CleanShot X is ideal if you want to capture, crop, and share recordings of your screen. Meanwhile, Filmage Editor, Capto, and CameraBag Pro let you crop and further optimize your videos with professional editing tools provide professional editing tools.
You can download these apps, along with others that boost your productivity on Setapp. Try them for 7 days without cost to find out which better suits your video editing needs.


